|
|
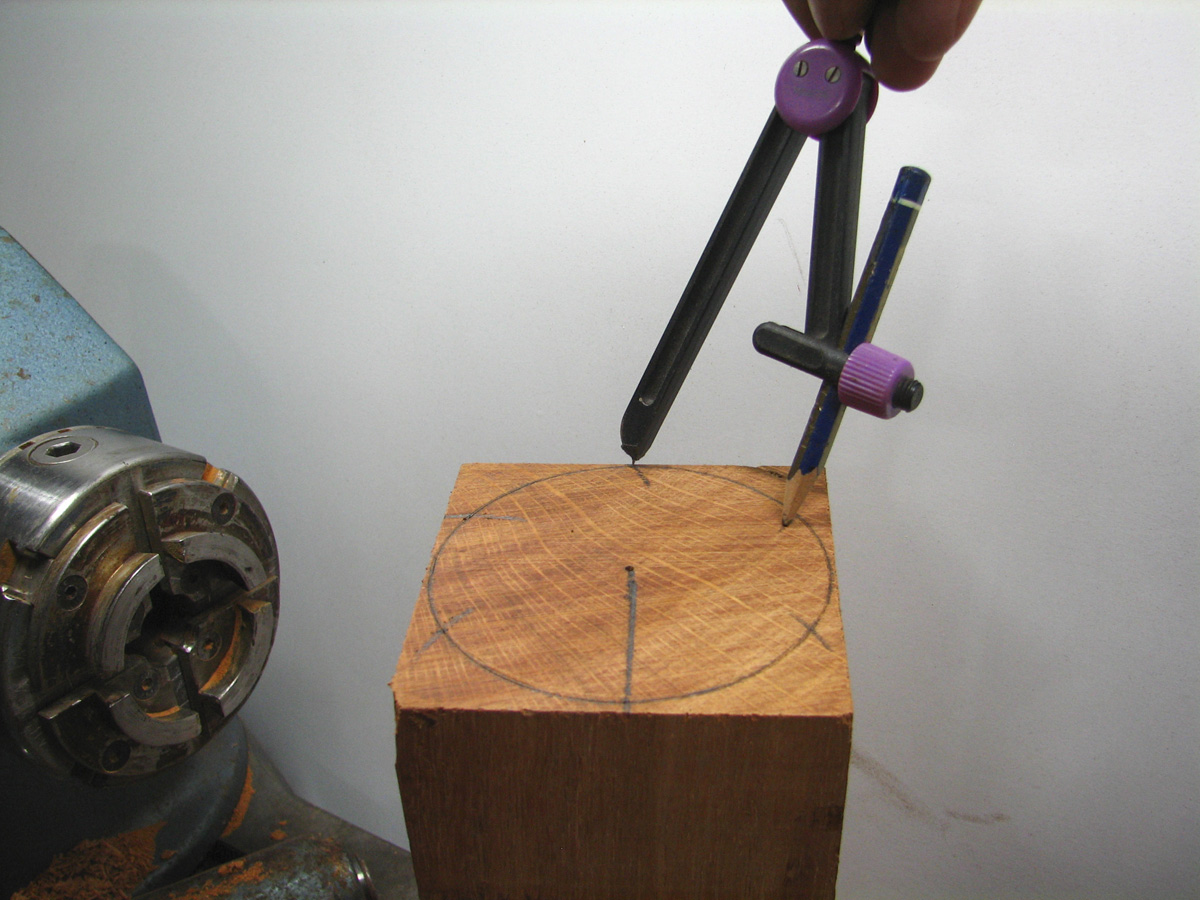
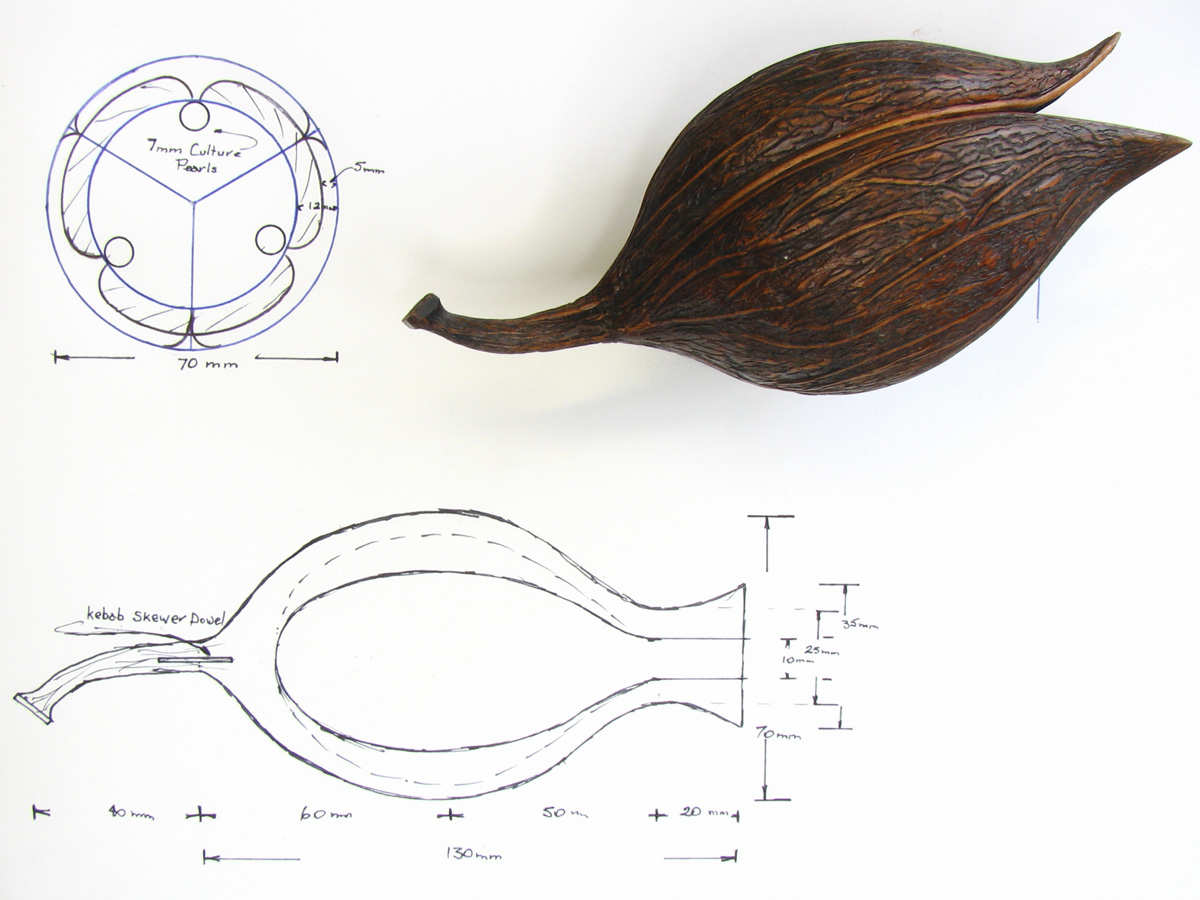
Select your wood to suit the finished size you have in mind. In my case I used a piece
130mm (51 1/8in) x 70mm (2 3/4in) diameter.
Because this piece consists of three sections, this needs to be marked out and cut. Use a
pair of compasses to draw out the required diameter and draw a line to the centre point,
squaring off the baseline. Keeping the compass on the same radius, bisect the circumference
starting at the previously drawn line.
You will find having gone round that you will arrive back exactly on the point where you started.
|
|
|
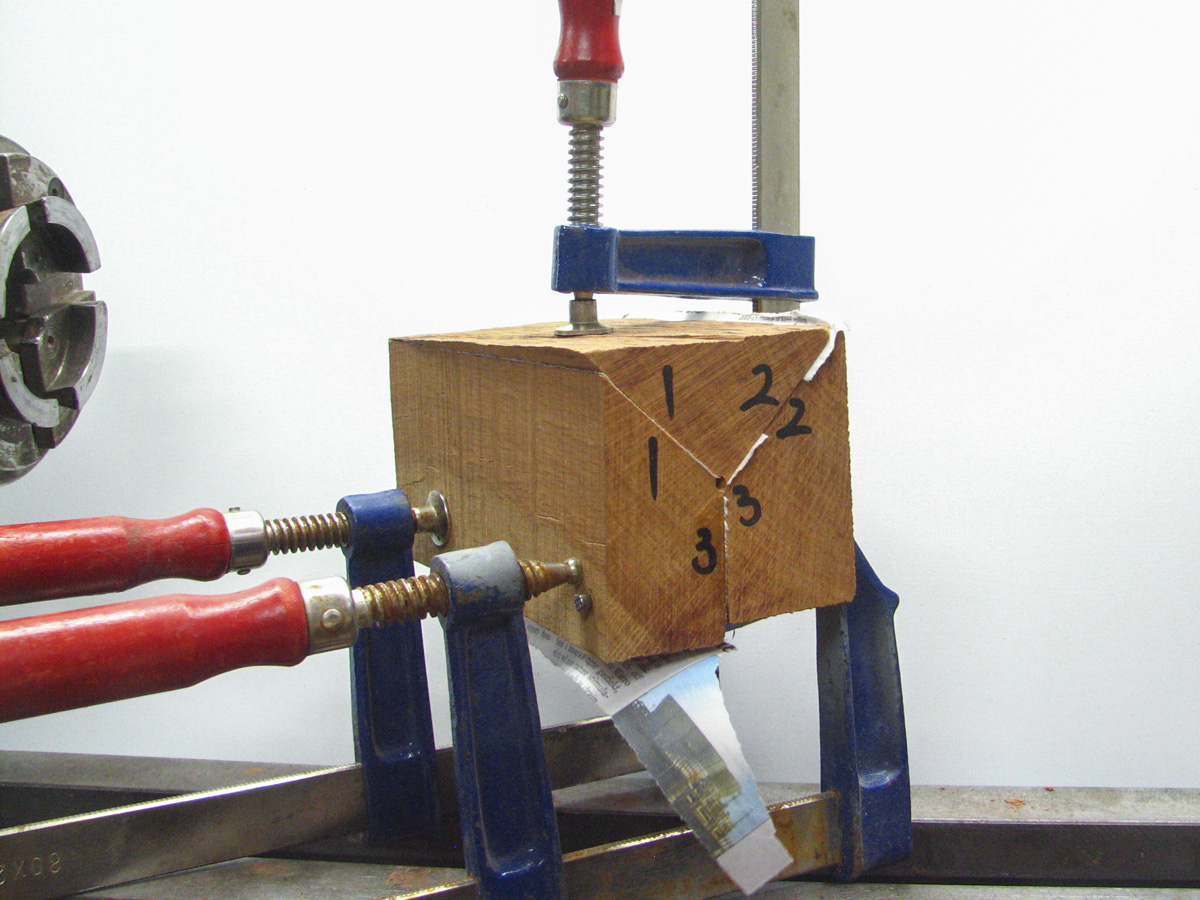
Meanwhile, you have divided the piece into six
equal portions from where it is easy to mark out the piece into three equal sections.
|
|
|
To cut the blank into three use a compound drop saw. However, "there are many roads
that lead to Rome," so if you are careful, a table or bandsaw will also do the job. A sanding disc
on your lathe will clean up the cuts to give a perfect fit. Some wood glue on all the surfaces,
a sheet of newspaper in between, three clamps to keep it all together, and hey presto! We're
nearly ready for some turning. Before you put chisel to wood I suggest you make a full-scale
drawing of the item. You are then able to set your callipers to whatever section you are
turning and transfer the exact measurements, and consequently the exact drawn shape.
Incidentally, this is a good procedure for any piece you may wish to make. A full scale
drawing (even on a bit of cardboard) will allow you to get the most out of your costly blank.
|
|
|
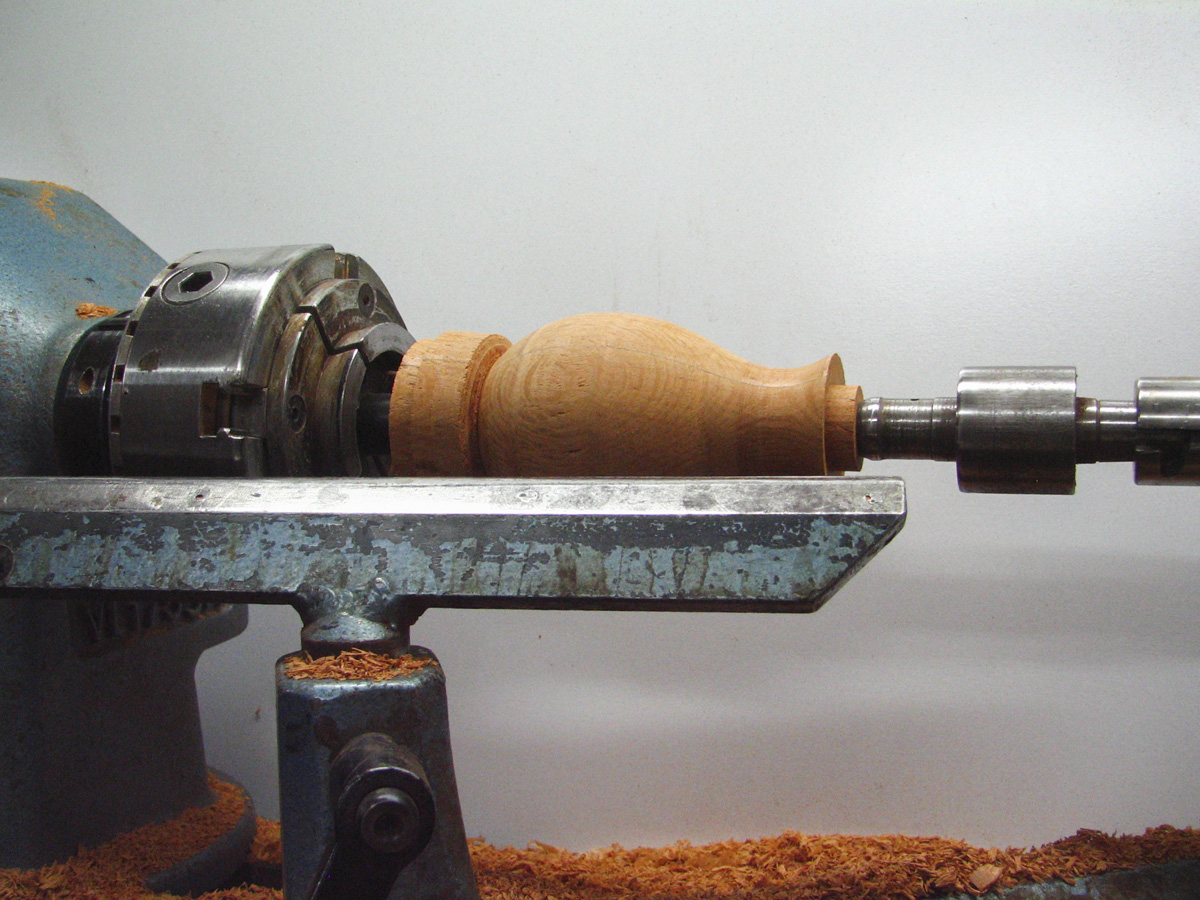
A paper glue joint needs to be treated with some respect; so ensure to take care during
this step. The idea is to split the blank in three when we want to, but not before.
Therefore it is important to use a ring-drive as well as a live ring centre when turning between centres
these hold the pieces together instead of wedging them apart and having them bounce
off the wall. With the help of your full-scale plan, you are now ready to turn your shape.
Turn a spigot on the base so you can hold the piece in your scroll chuck, and now you are
ready for hollowing.
|
|
|
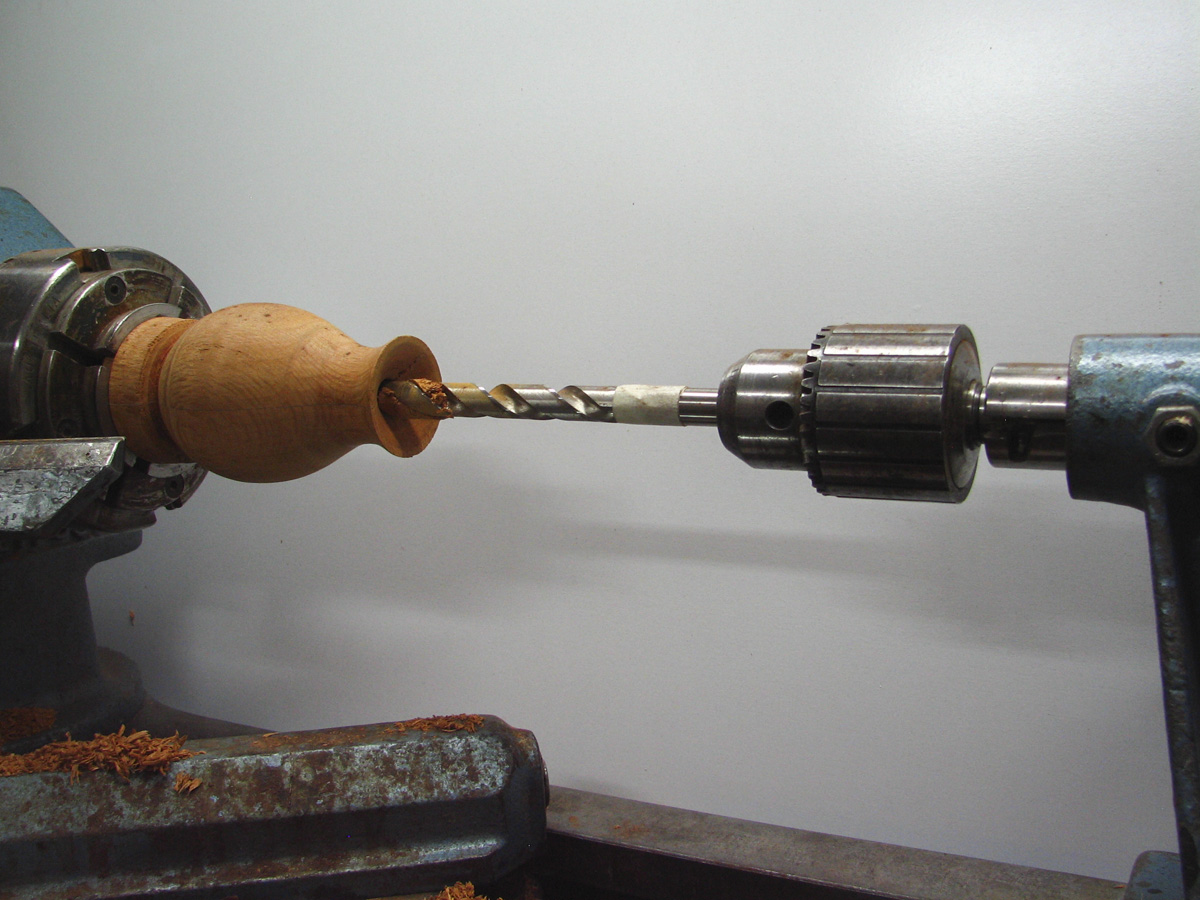
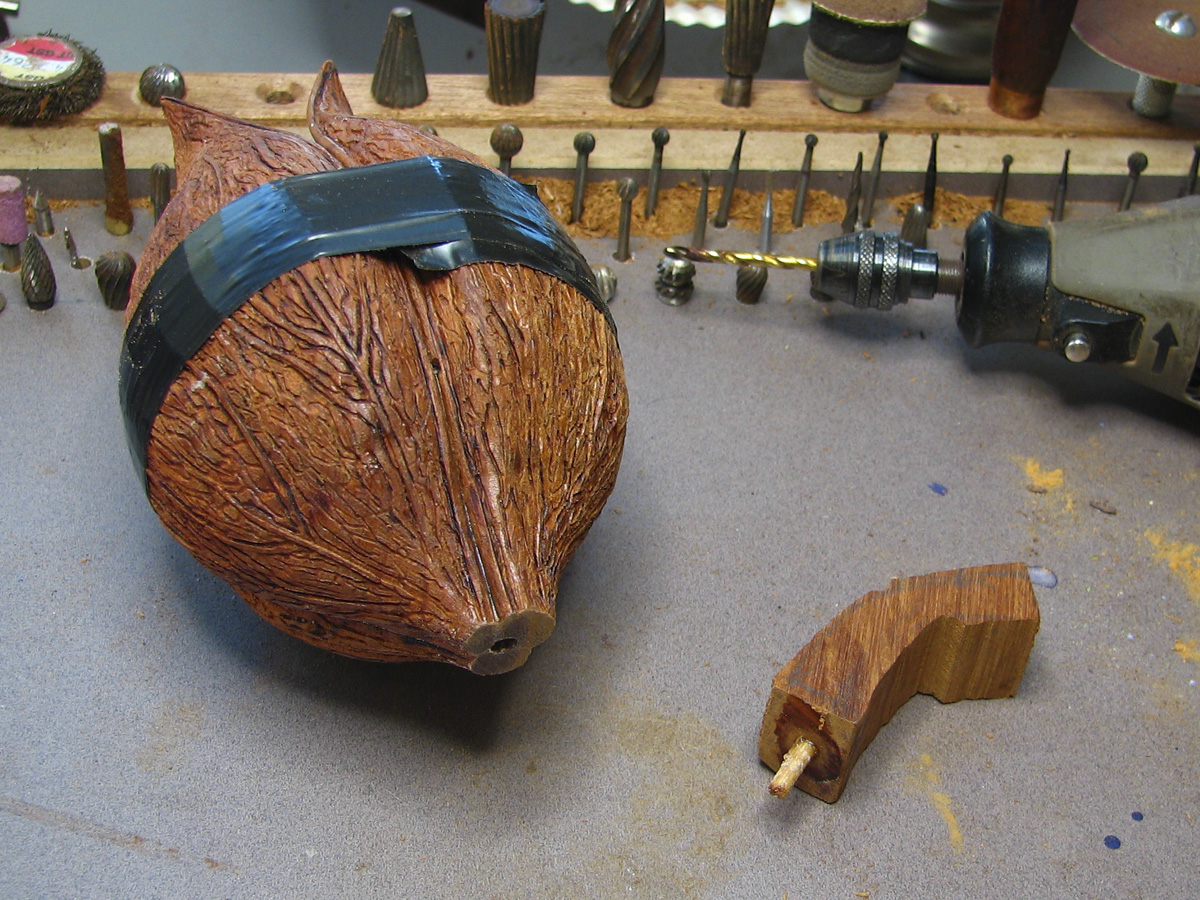
Not having any support at the opening end now means you will need to do something
to stop the piece splitting apart, like a ripe banana. A great tool here is 'duct tape', which
helps ensure that the piece will not split during this process. Duct tape is strong yet has a
certain amount of stretch perfect for this task. Wrap the tape tightly around the neck (see next photo).
Next, drill a 10mm (3/8in) hole to the required hollowing depth.
|
|
|
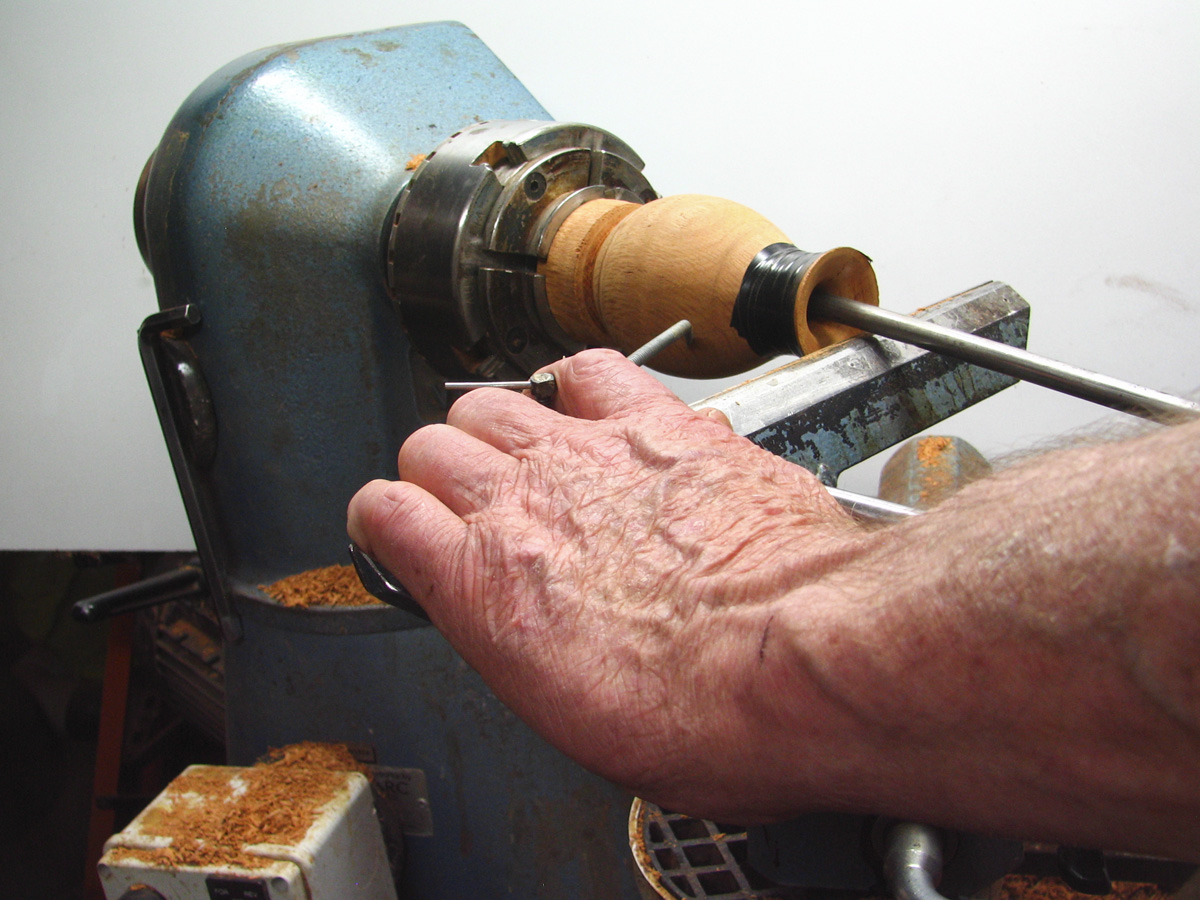
After this it is just a matter of peeling the wood off to the correct thickness as per the plan you have previously drawn out.
The hollowing tool used here was one of of my own design and manufacture (see next photo),
with a HSS hookcutter on the business end, but a scraping tip will work as well.
|
|
|
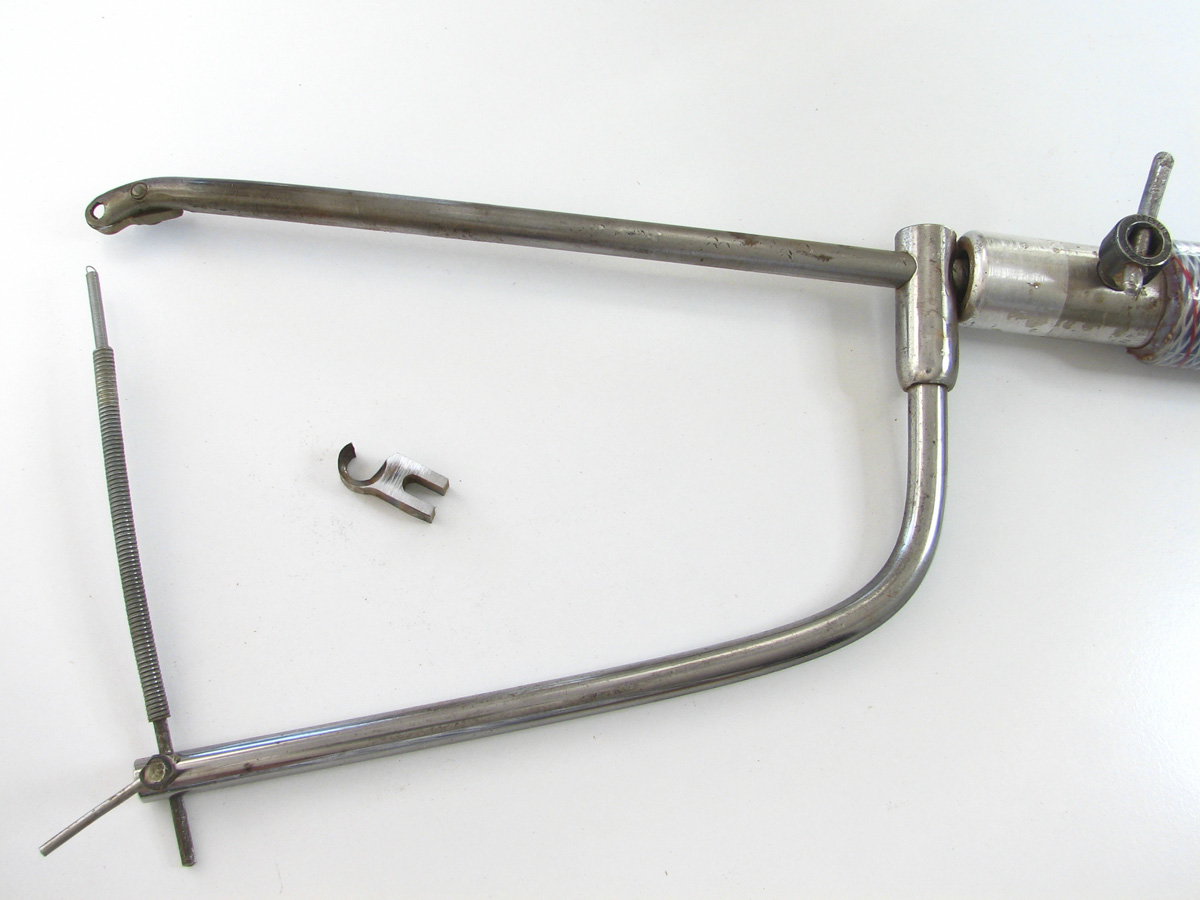
Here is the homemade hollowing tool shown more clearly. The tool is made out
of 'bright steel rod' which is generally used for shafts it is a higher tensile than the
black steel. The outrigger is not welded, but a bigger diameter section is drilled to the exact
same diameter as the shaft-steel and pinned and clinched together.
The adjustable spring
can be set to the required thickness, with the spring trailing on the outside until the desired
thickness is attained, when it will just run clear of the piece (see previous step). The cutter is
made out of HSS (High Speed Steel) using the drill press and the grinding wheel.
|
|
|
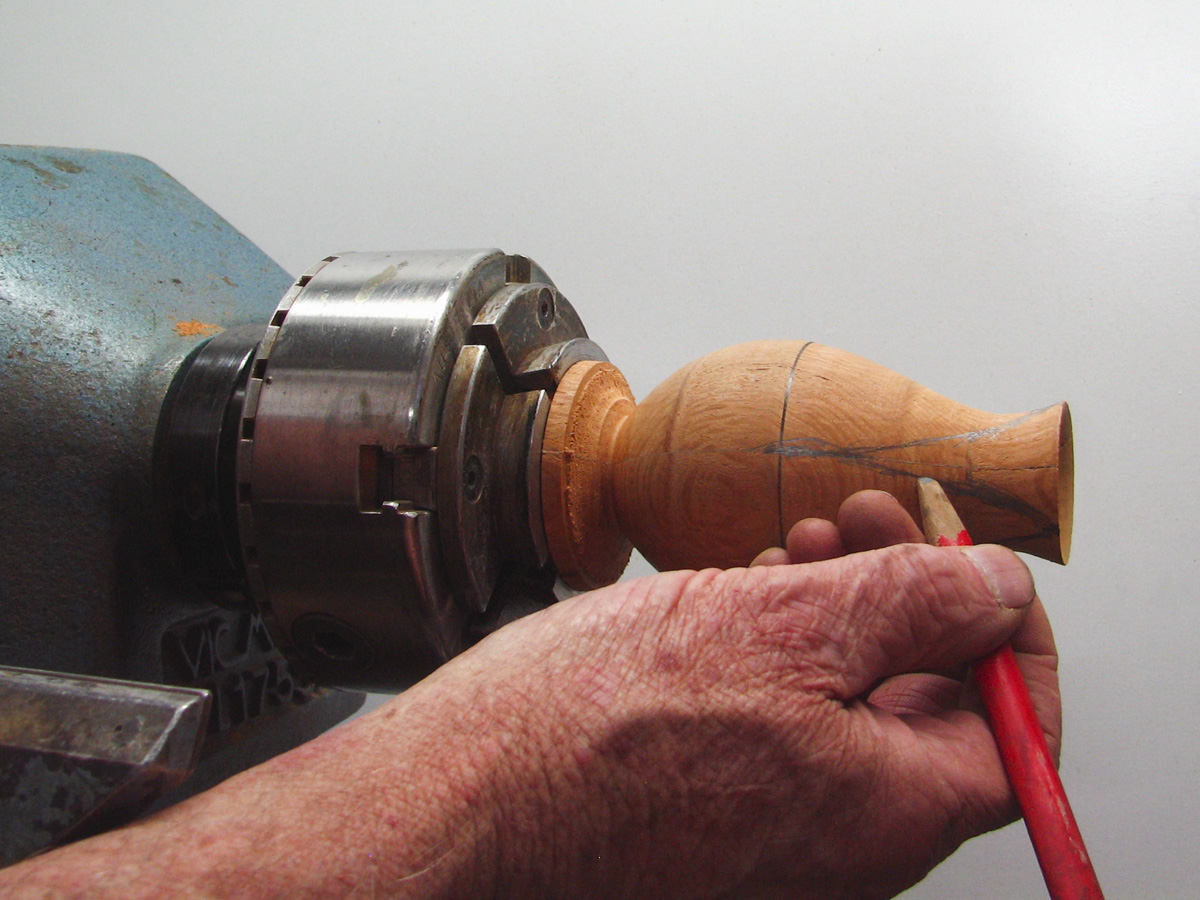
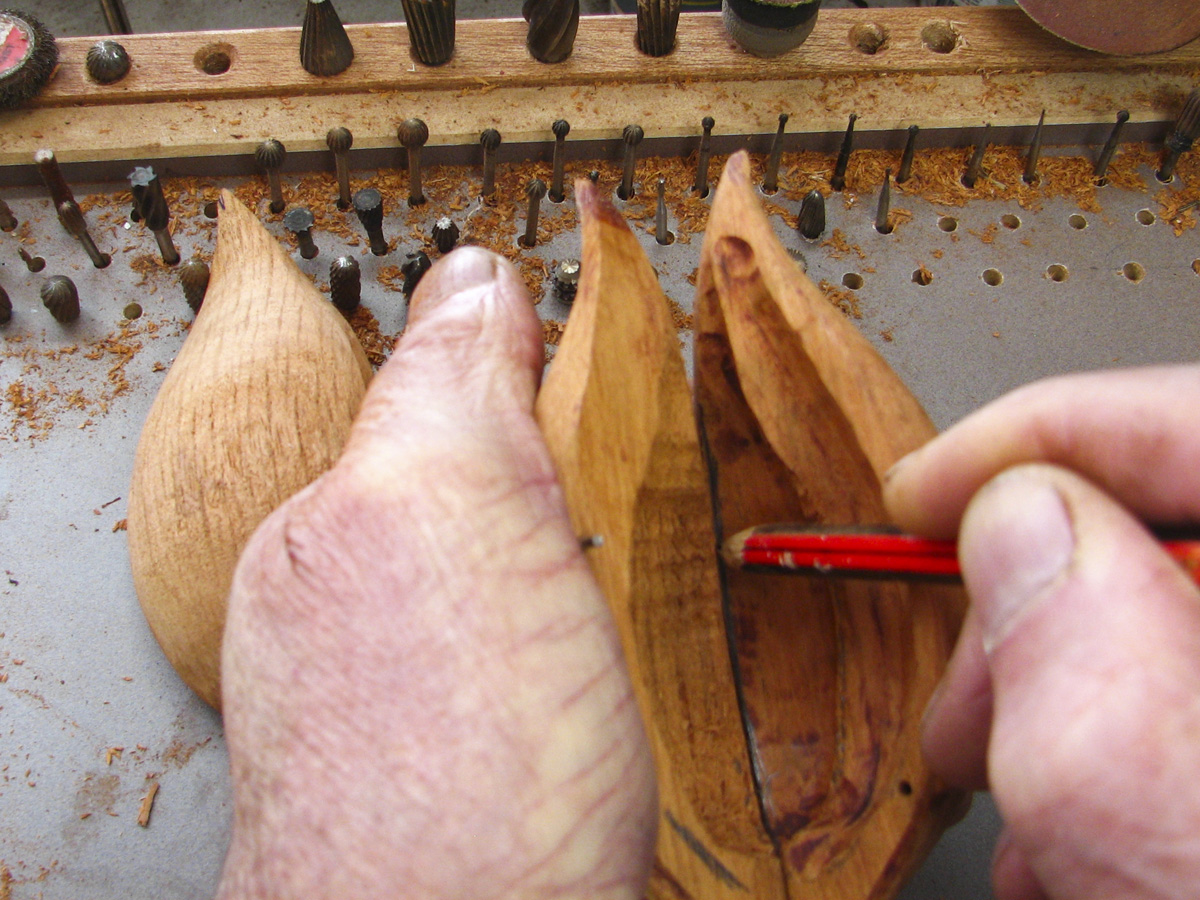
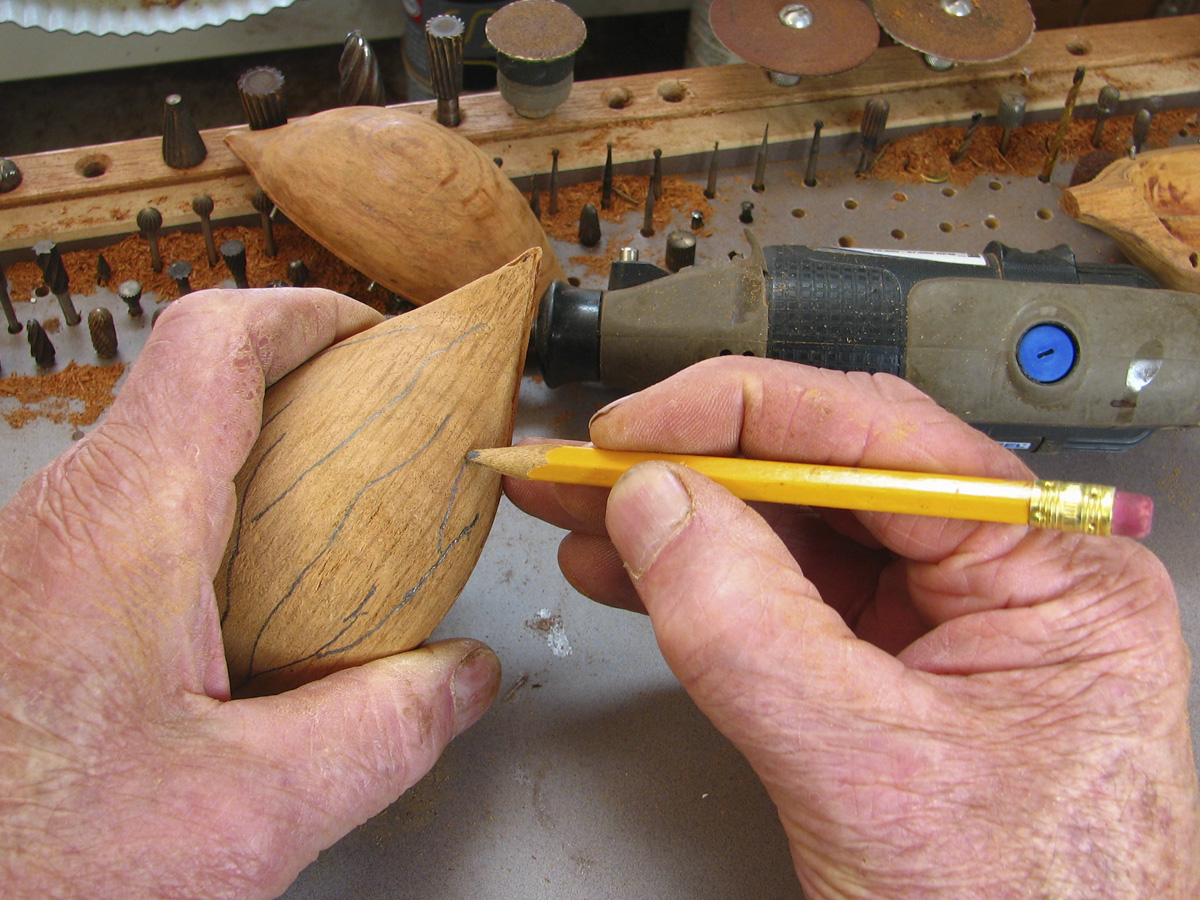
Having satisfactorily hollowed the piece you are now ready to mark out the bits,
which need to be cut away to create the points. You can mark this out later if you wish, but I
find now is the more convenient time.
A line on the piece while the lathe is spinning gives you
the depth of your incision. The point is exactly halfway between the glue joints; all you need
is a pencil.
|
|
|
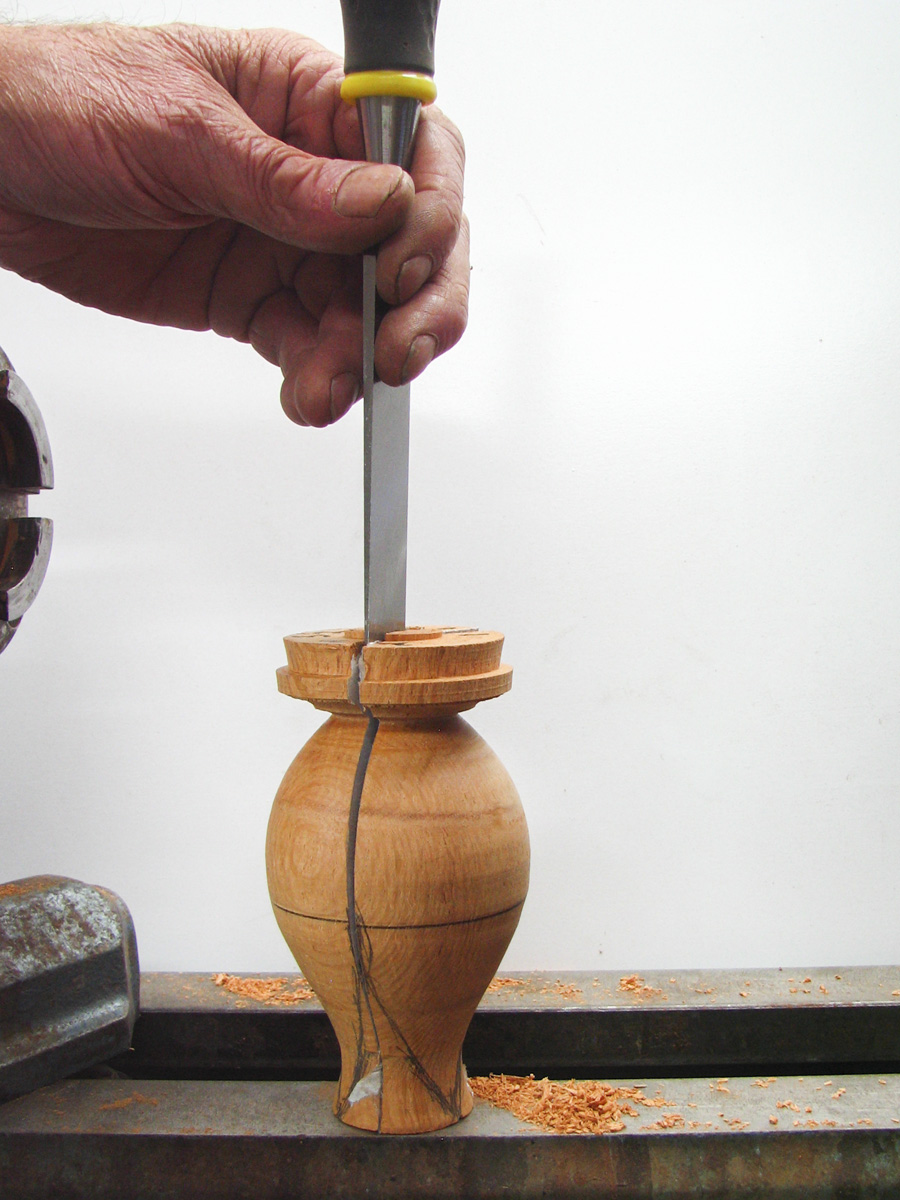
Take a wood chisel and place exactly on the paper joint. A few gentle taps with a mallet
and you will be relieved to find you have your three equal sections.
|
|
|
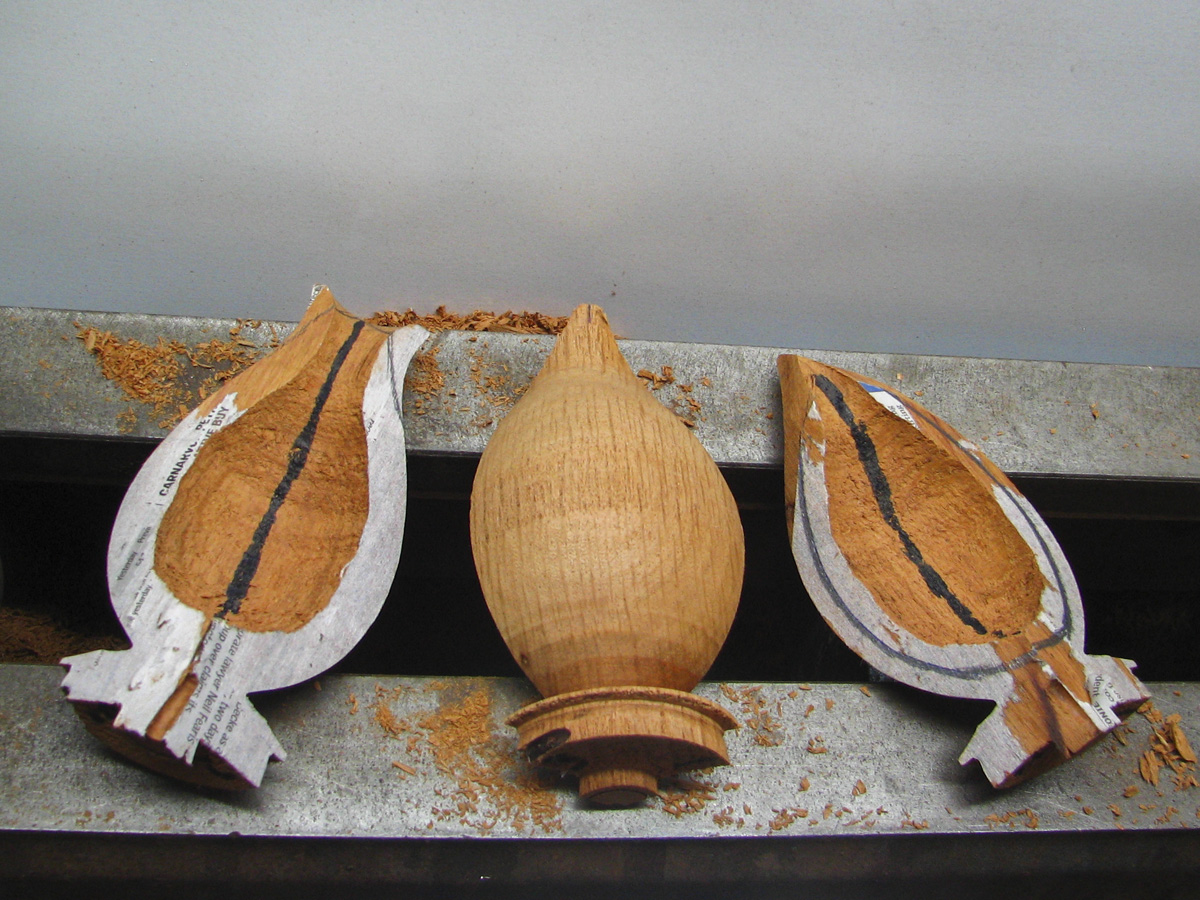
Here are three pieces at various stages.
Using a coarse sanding disc is an easy, controlled way to do your rough shaping.
|
|
|
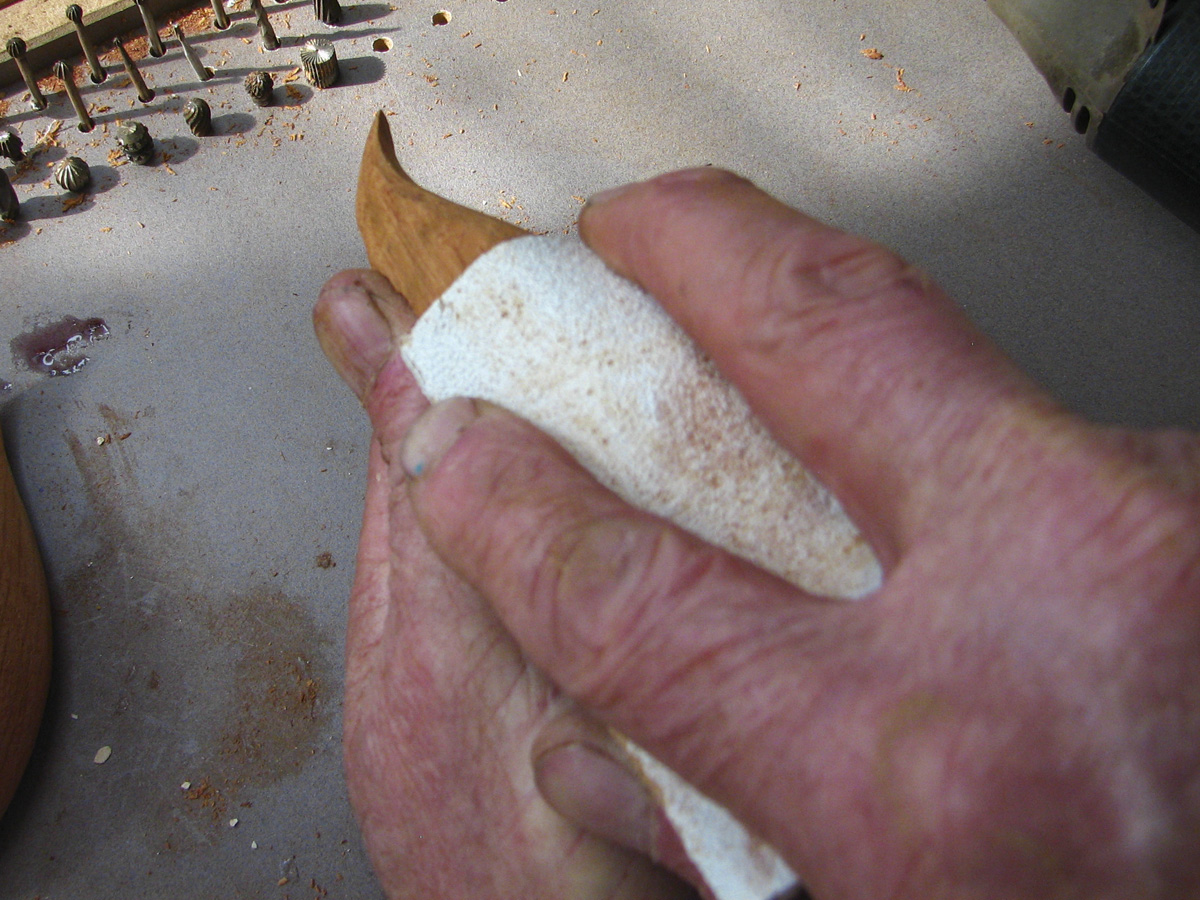
To further refine the outside shape you now need to focus on rounding the corners.
First, mark out how far the rounding is to go, then proceed with whatever tool you have best
suited to the task.
|
|
|
|
|
|
|
|
|
Having roughed out your shape the three sections now need to be joined
together for the final outside shaping of the pod. Use small nails as 'dowels' to keep each
section in its correct position. First, drill two holes on one side and insert nails and cut
so only the point protrudes (these are your 'marker nails').
Now, line up the two sections in
their correct position and press them together forcefully; the imprints will now give you the
exact position for the matching holes on the opposite section. Drill these, insert dowels and
now you have one joint done. Use the same procedure for the other two joints. No glue
yet, at this stage.
|
|
|
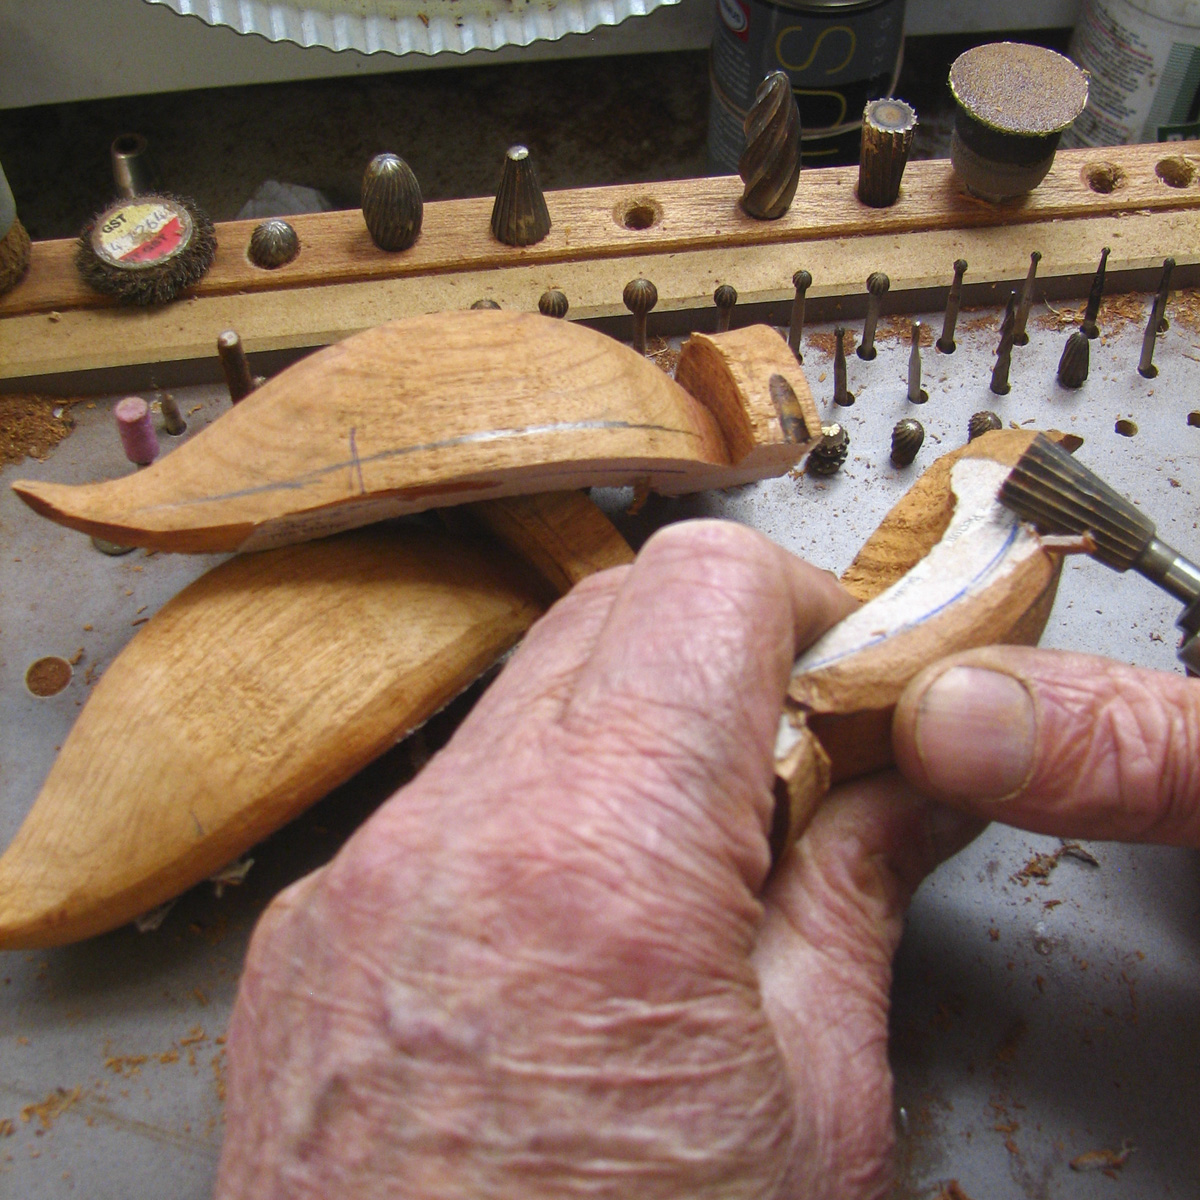
Holding the three sections together, use a file, rasp or coarse sandpaper to
tidy up and align the joined sections.
|
|
|
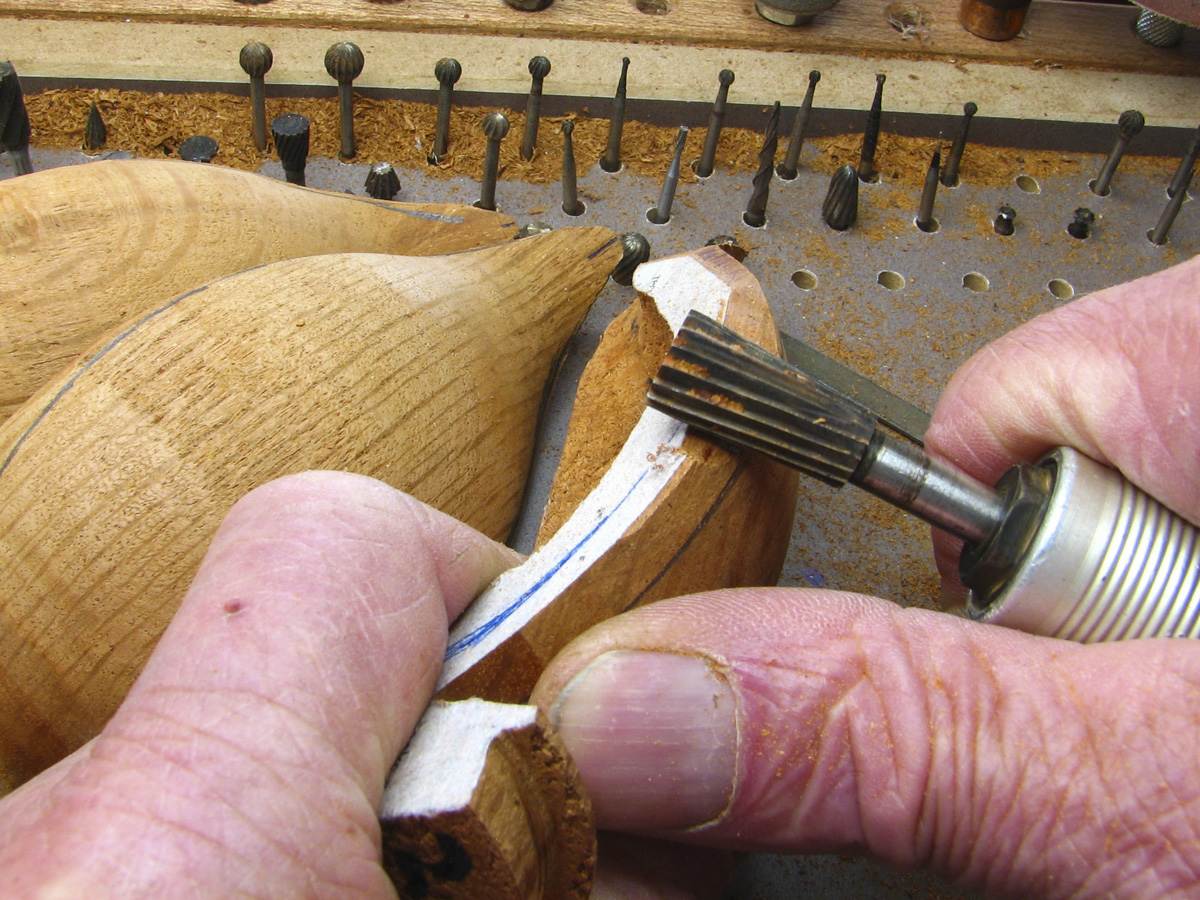
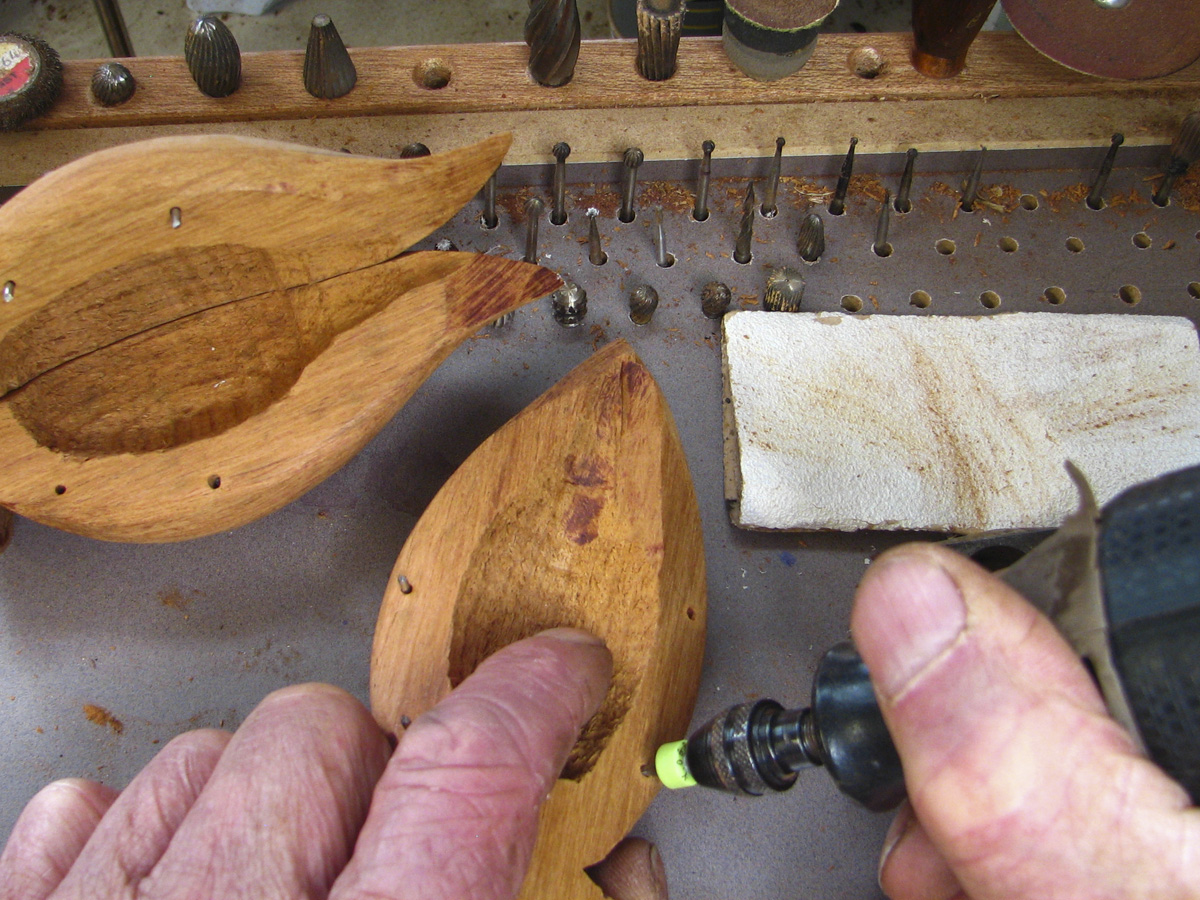
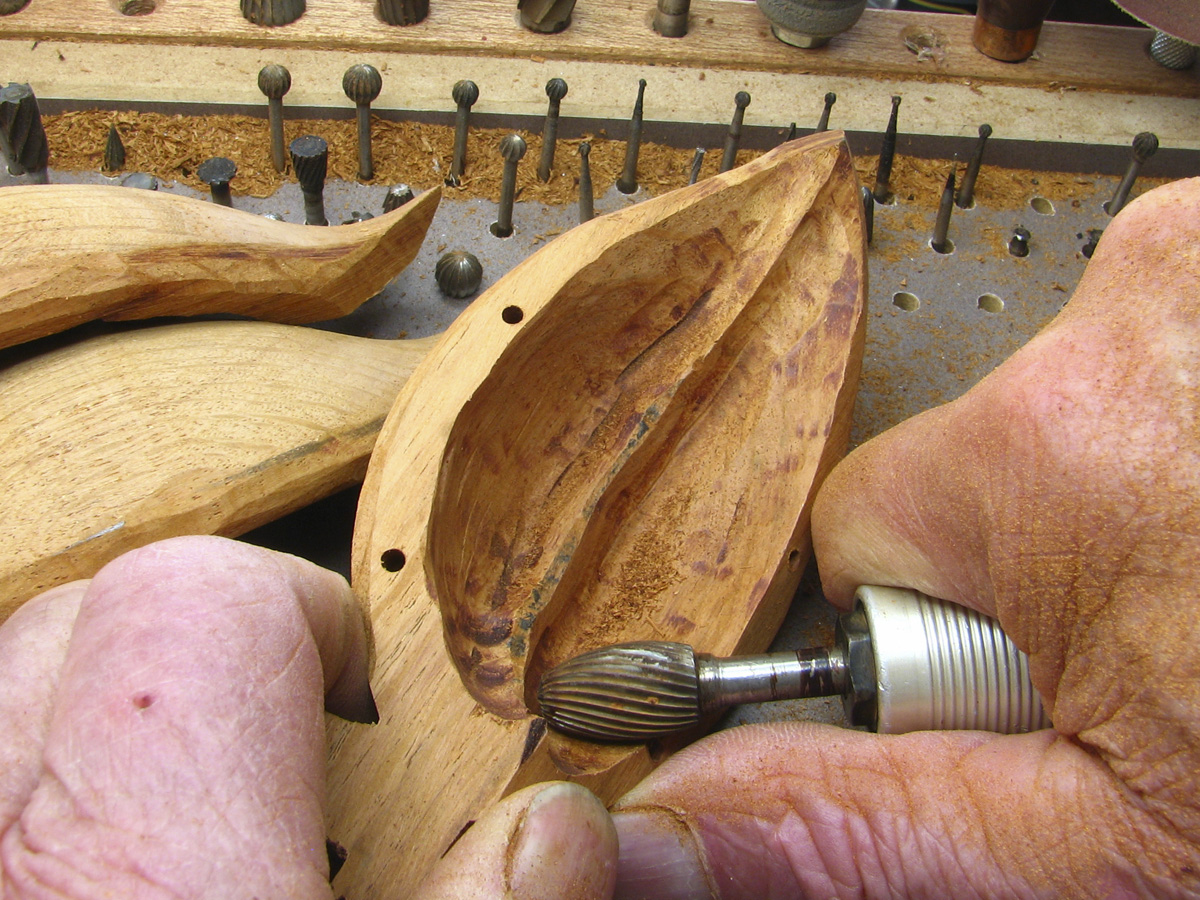
The next step is to mark and carve out the interior, leaving a central ridge to
attach the pearls onto.
|
|
|
|
|
|
|
|
|
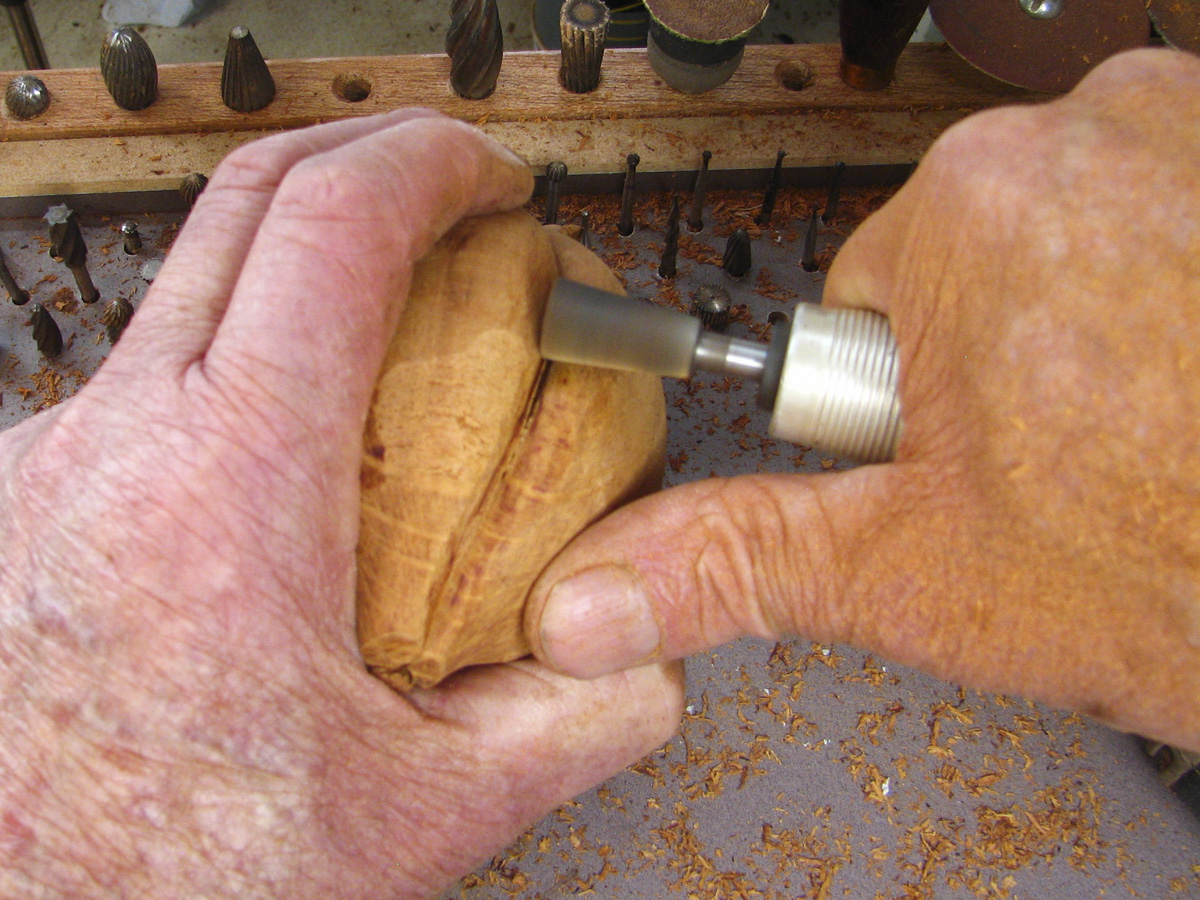
It is now time to put the fine rim into place; this is easier than may first be
thought. What you require is a 'pyramid' shape burr. When fitting the burr, set the distance
between it and the chuck to the thickness of the thin rim, which is about 1-1.5mm (5/64-1/16in).
You are now able to use this as a marking gauge. To prevent the chuck from damaging
the work round off the chuck corner by holding the spinning chuck against a spinning grinding
wheel.
Now, move your marking gauge gently around the perimeter and you will notice that
you get a nice even score mark that is if you keep the Dremel square off the work. Once you
feel comfortable with the technique switch on the unit and gently, with even strokes, carve
away 1-1.5mm (5?64-1?16in). The cutter shaft can be used as a depth gauge; the deeper you want
to go, the bigger the cutter needs to be. All this effort leaves the rim section standing nicely
proud of the rest of the pod.
|
|
|
Do the same on the other side where the sections do not touch each other the
'open' part of the pod.
If you find your 'fine rim' doesn't look so fine but is rather angular, don't
worry, this can soon be rectified with some simple files, rifflers or abrasive paper.
|
|
|
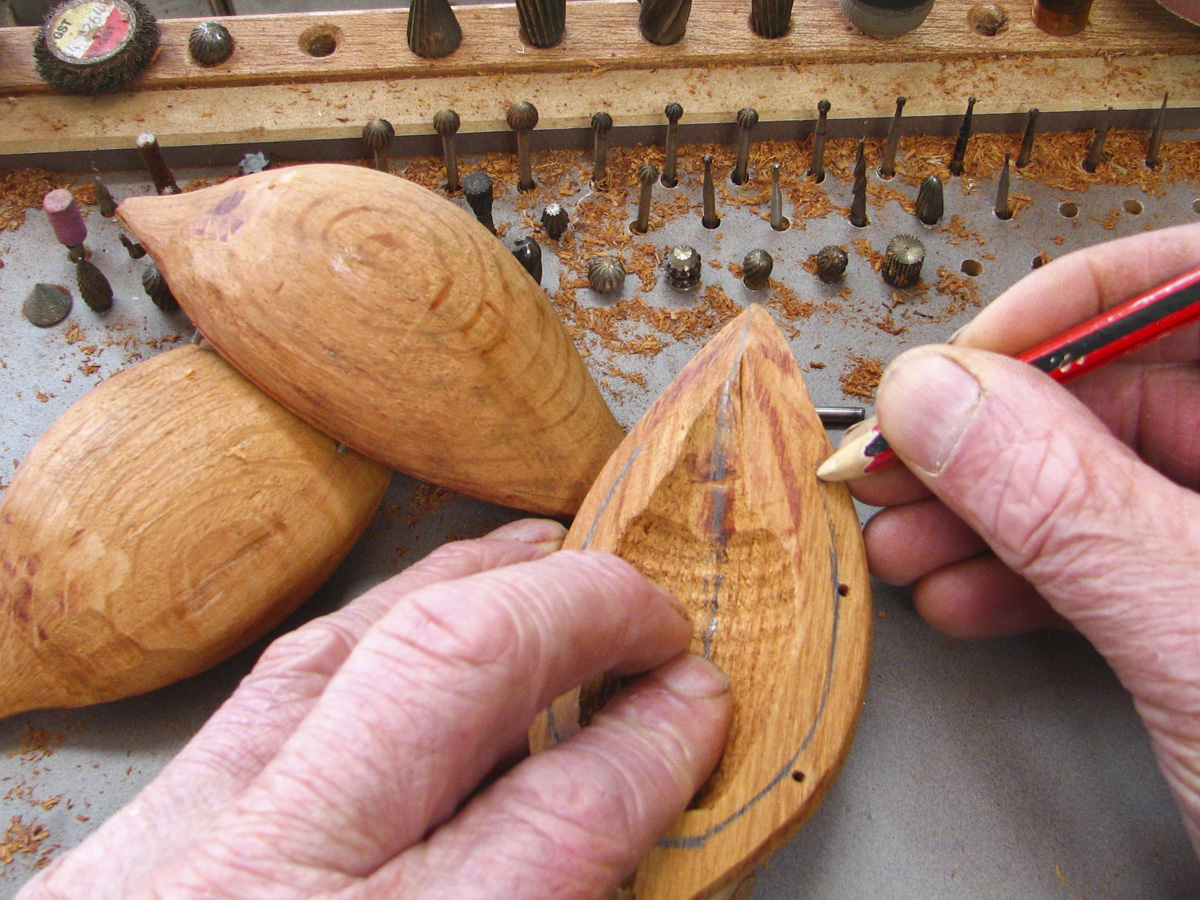
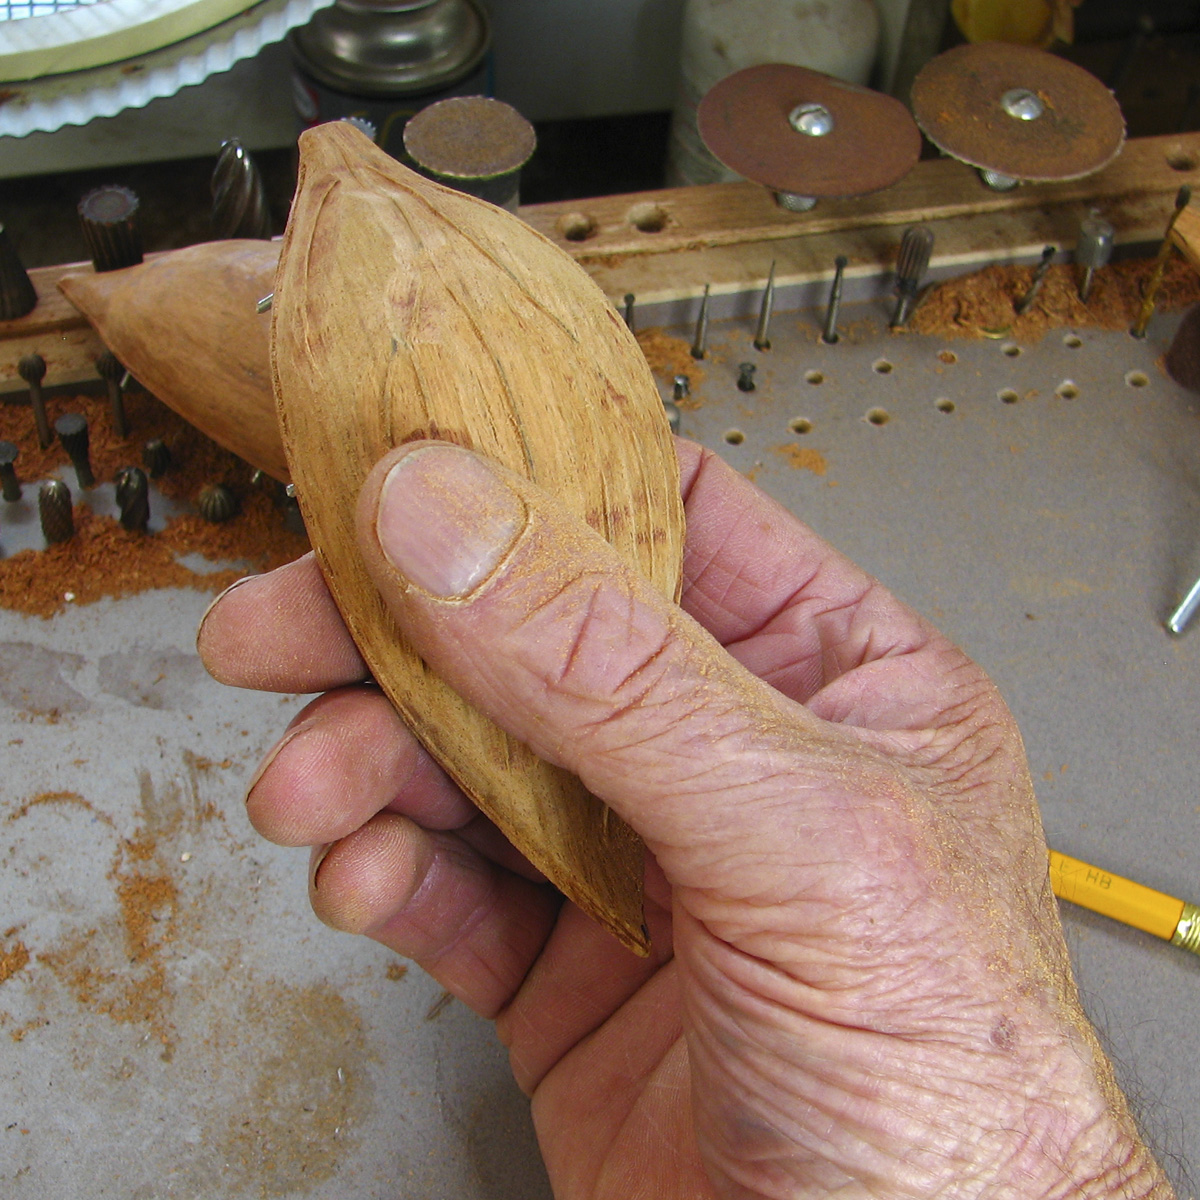
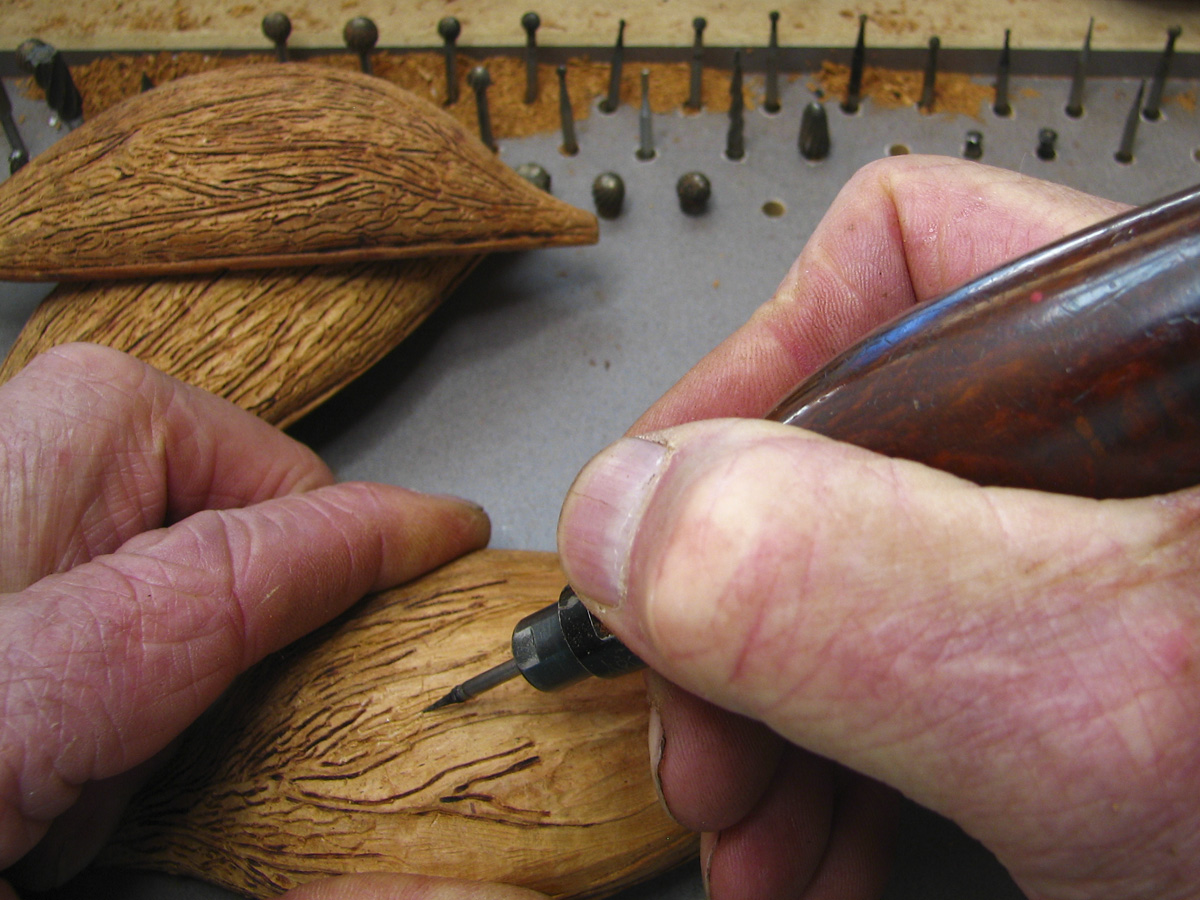
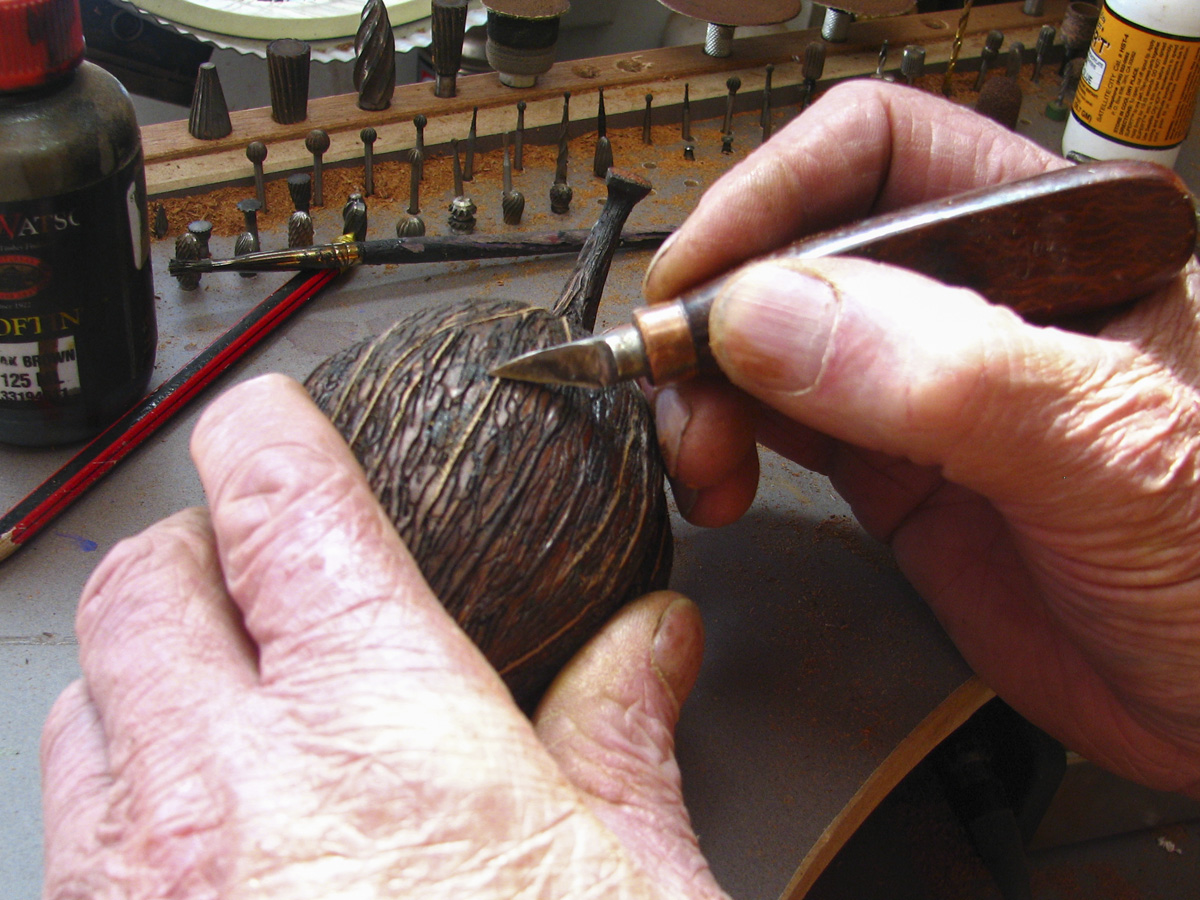
Now, mark the veins on the outside of your pod. These veins are relief carved
so they protrude about 1mm (5/64in).
|
|
|
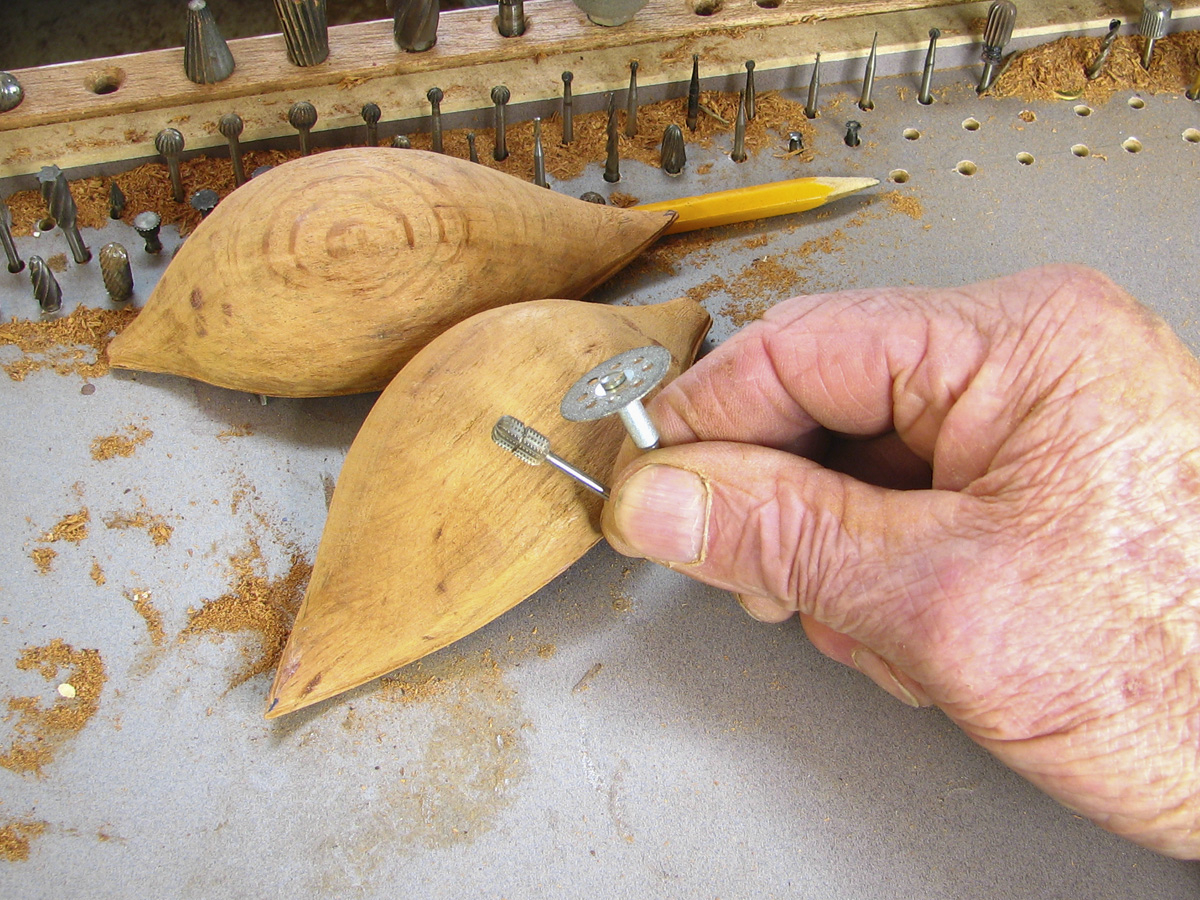
The relief carving is made easier by doctoring a cylinder type burr. With
a diamond disc cut a 1 x 1 mm (5/64 x 5/64in) groove in the cutter. This cutter now leaves
a nice neat vein of course the neatness depends on how controlled the cut is.
|
|
|
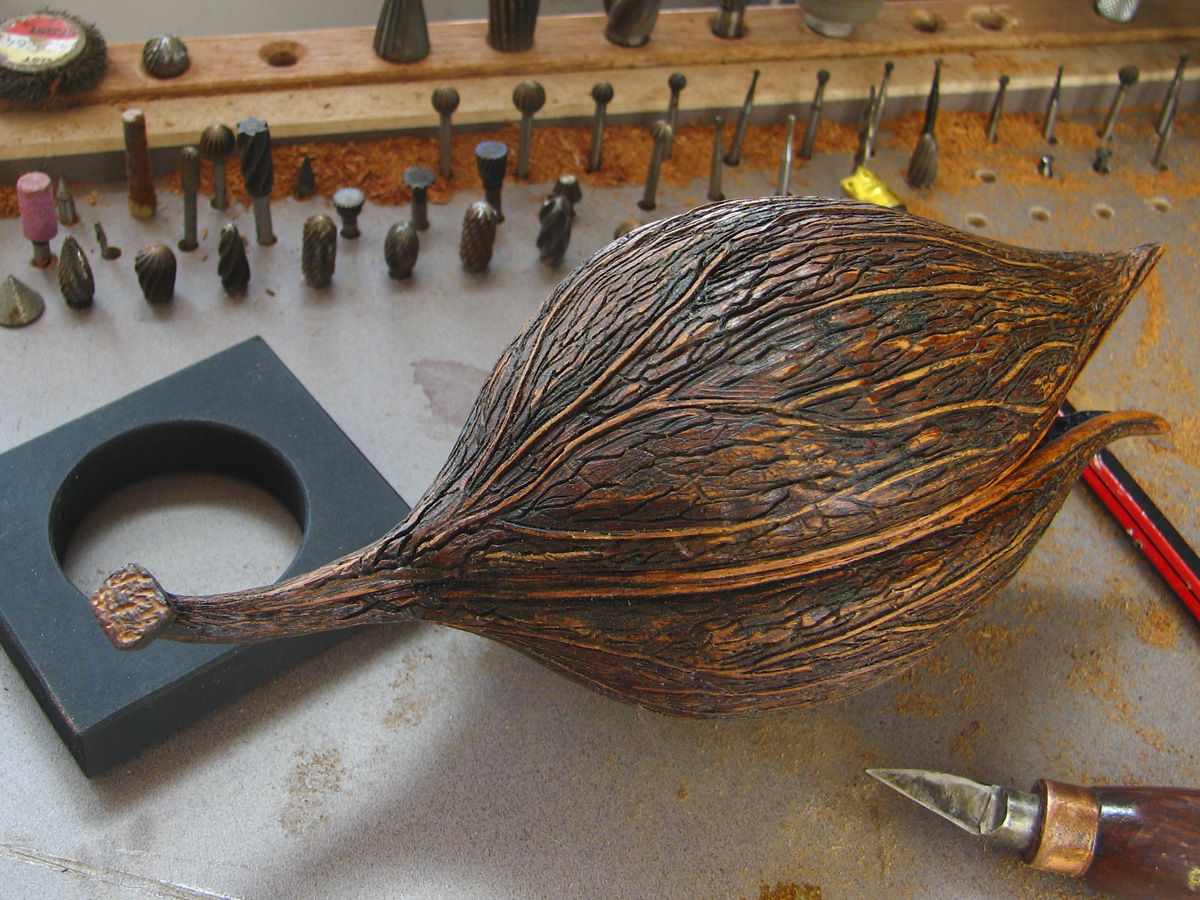
Here, you can see the result of using the cutter. Ensure to be as controlled as
possible when using this to create a neat vein.
|
|
|
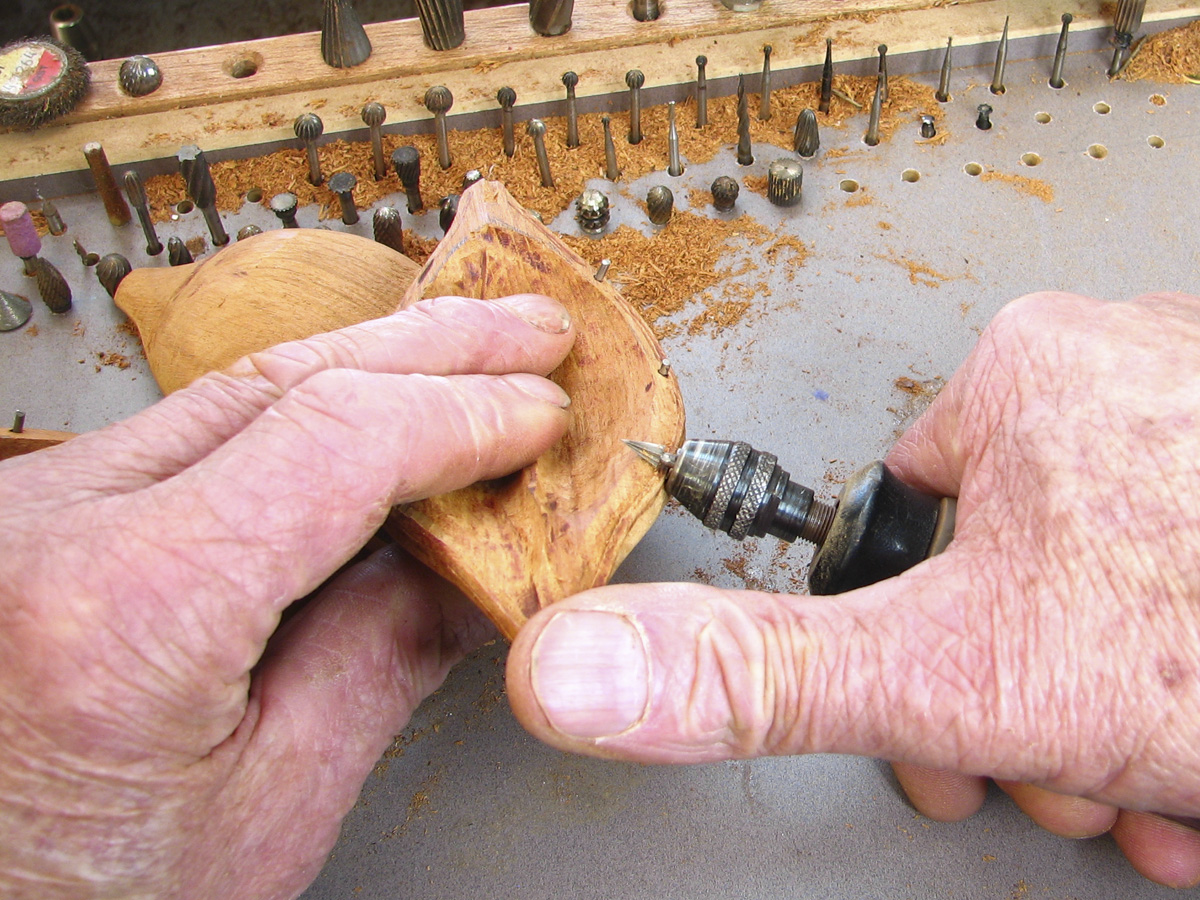
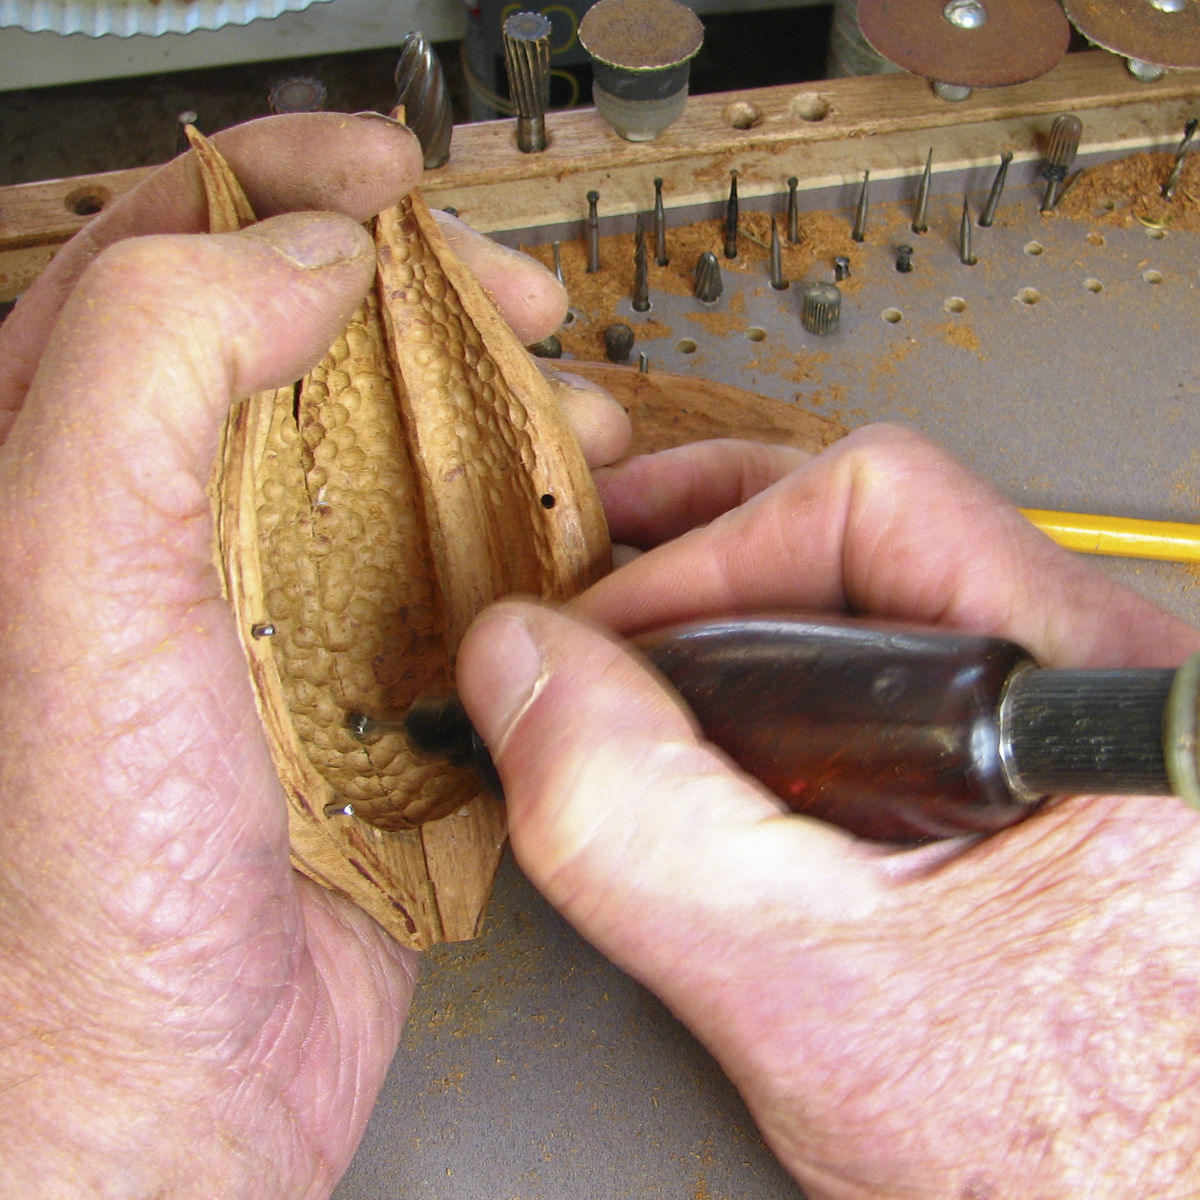
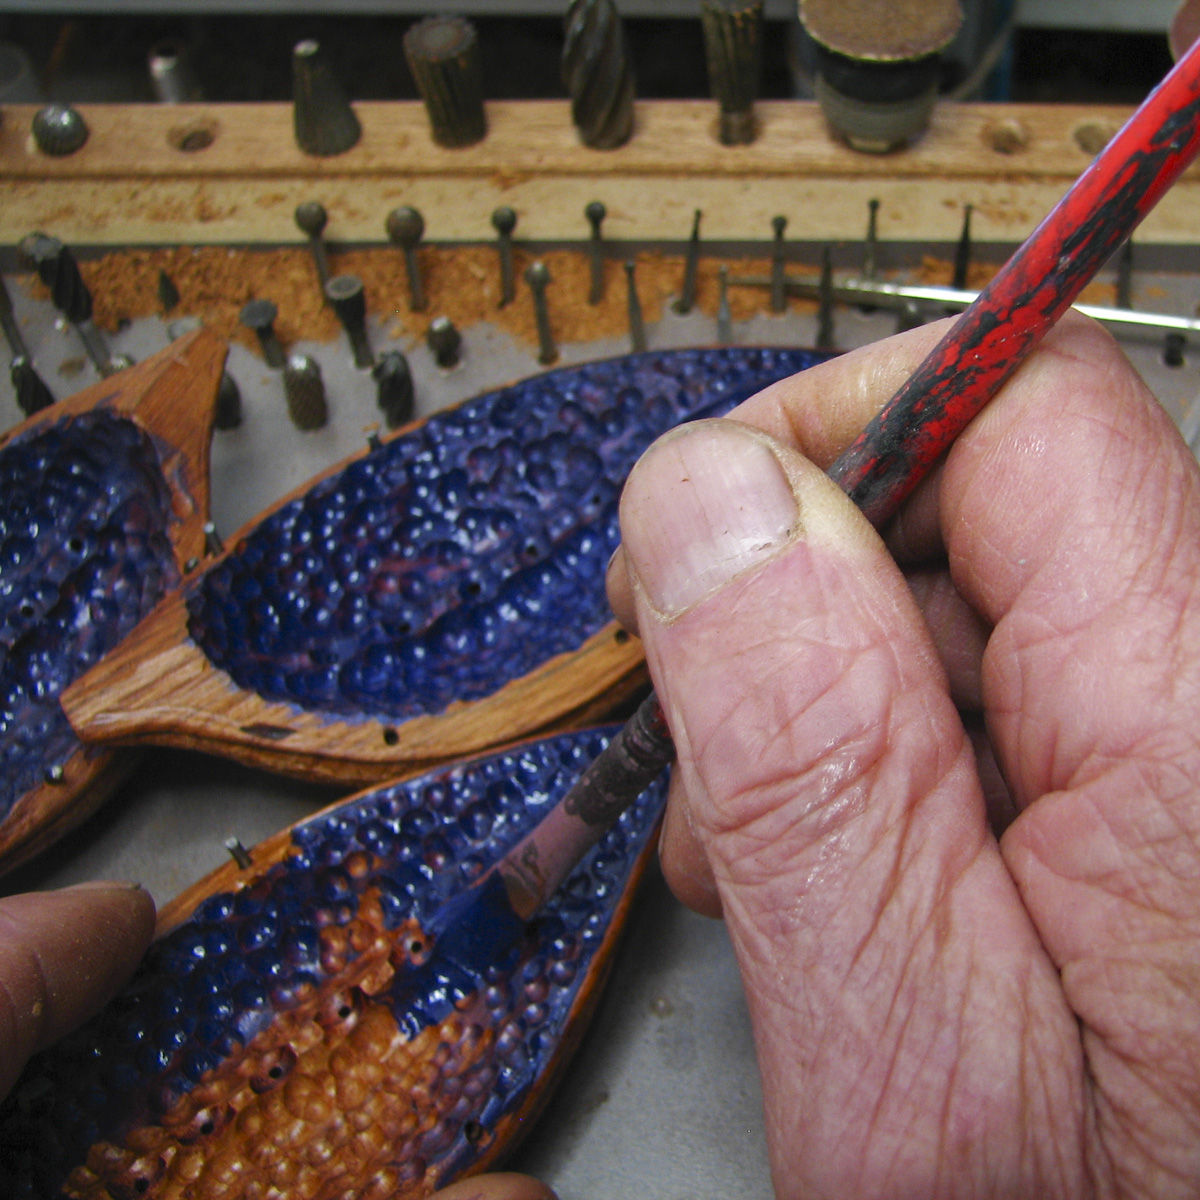
It is now time to dimple the interior of the pod. Care must be taken so you do
not damage the fine rim, but do dimple right up to it. You will notice here that I am holding two
sections together whilst dimpling randomly over the joint this will help to disguise it.
|
|
|
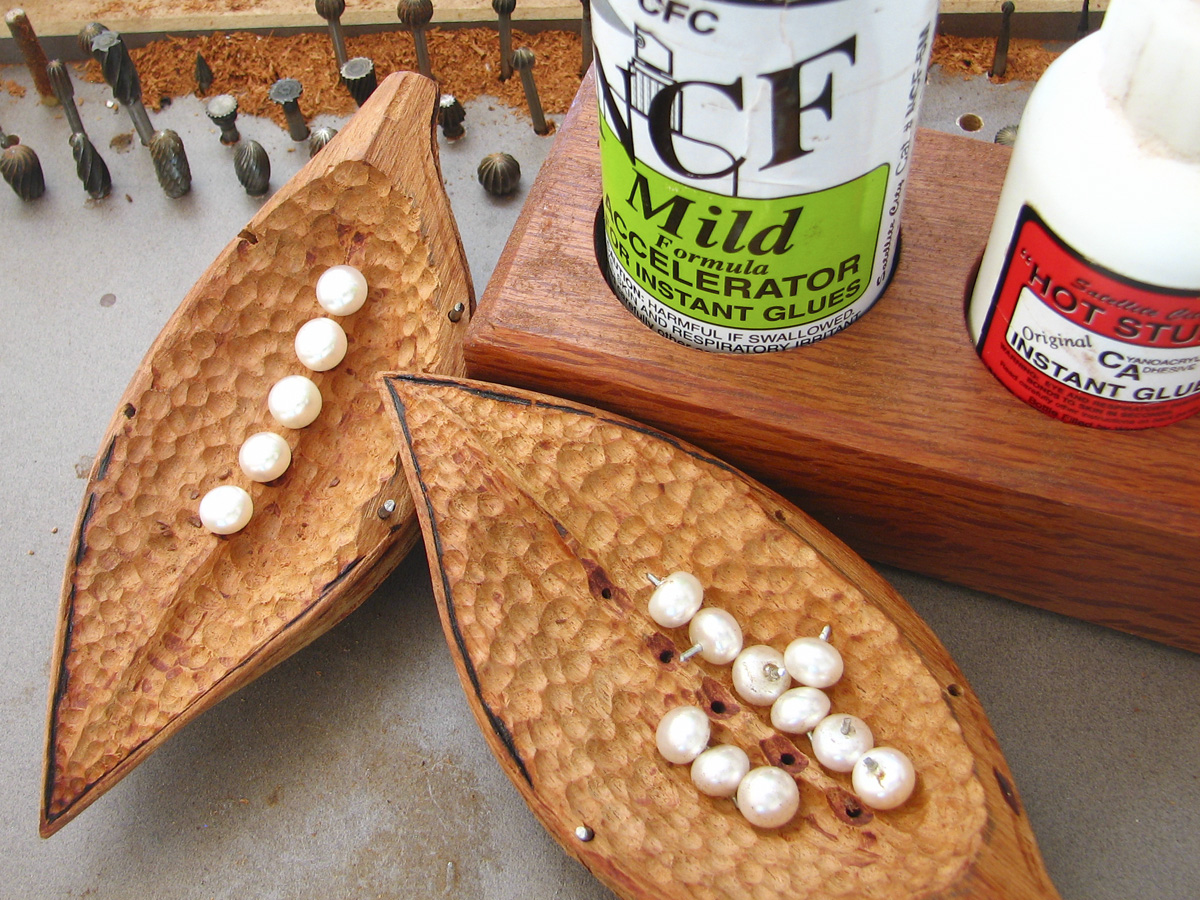
Half drilled sweet water cultured pearls can be purchased from a jewellery
supply shop. I suggest you do a web search and compare prices as they vary greatly.
You need short pieces of thin wire or small nails that match the diameter of the drilled hole; these
are then positioned in place with cyanoacrylate glue. Prepare the position of each pearl by
grinding a small dish for them to sit in, in the centre of which you drill a hole for each pin.
|
|
|
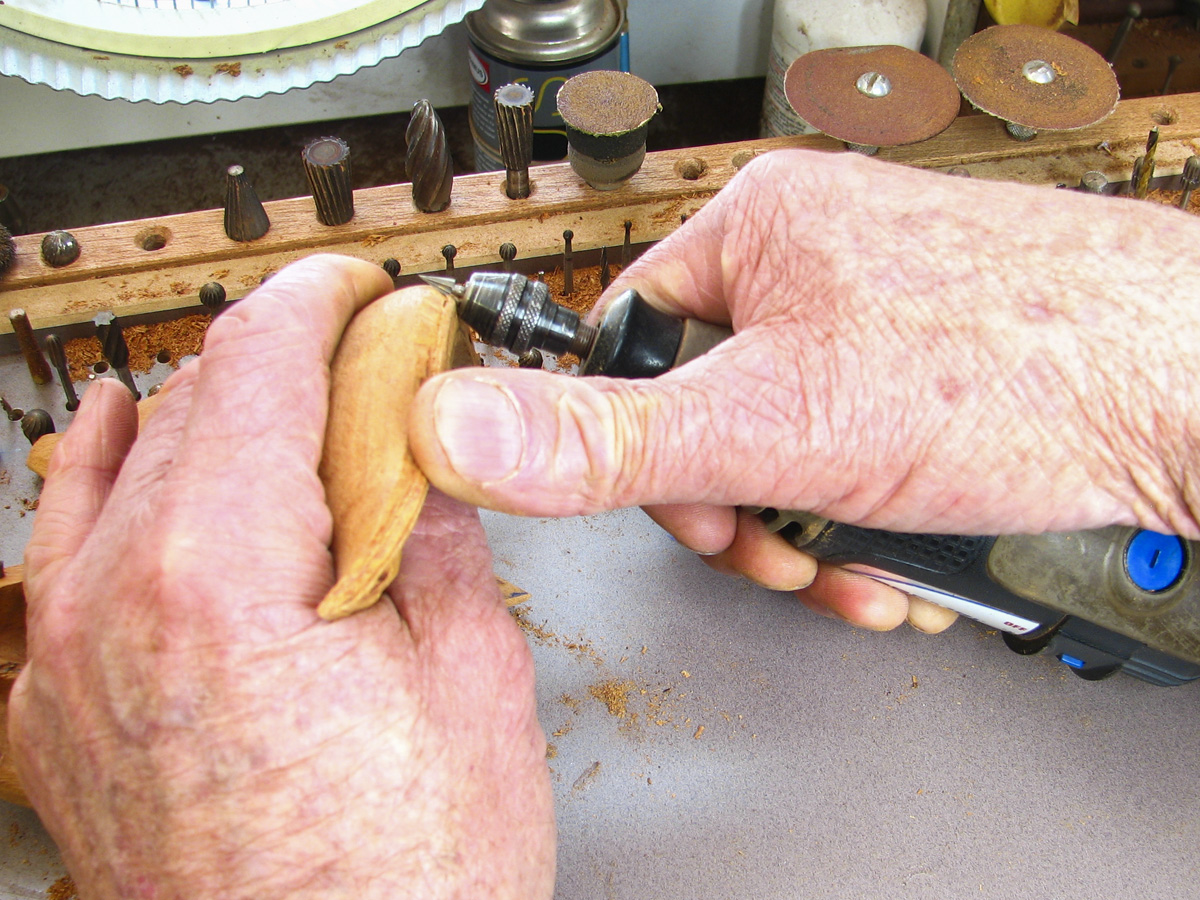
There is still some work to be done on the outside, and that is the texturing.
Use the smallest possible burr to texture between the veins.
Practise on a piece of scrap
until you have a pattern you are happy with.
|
|
|
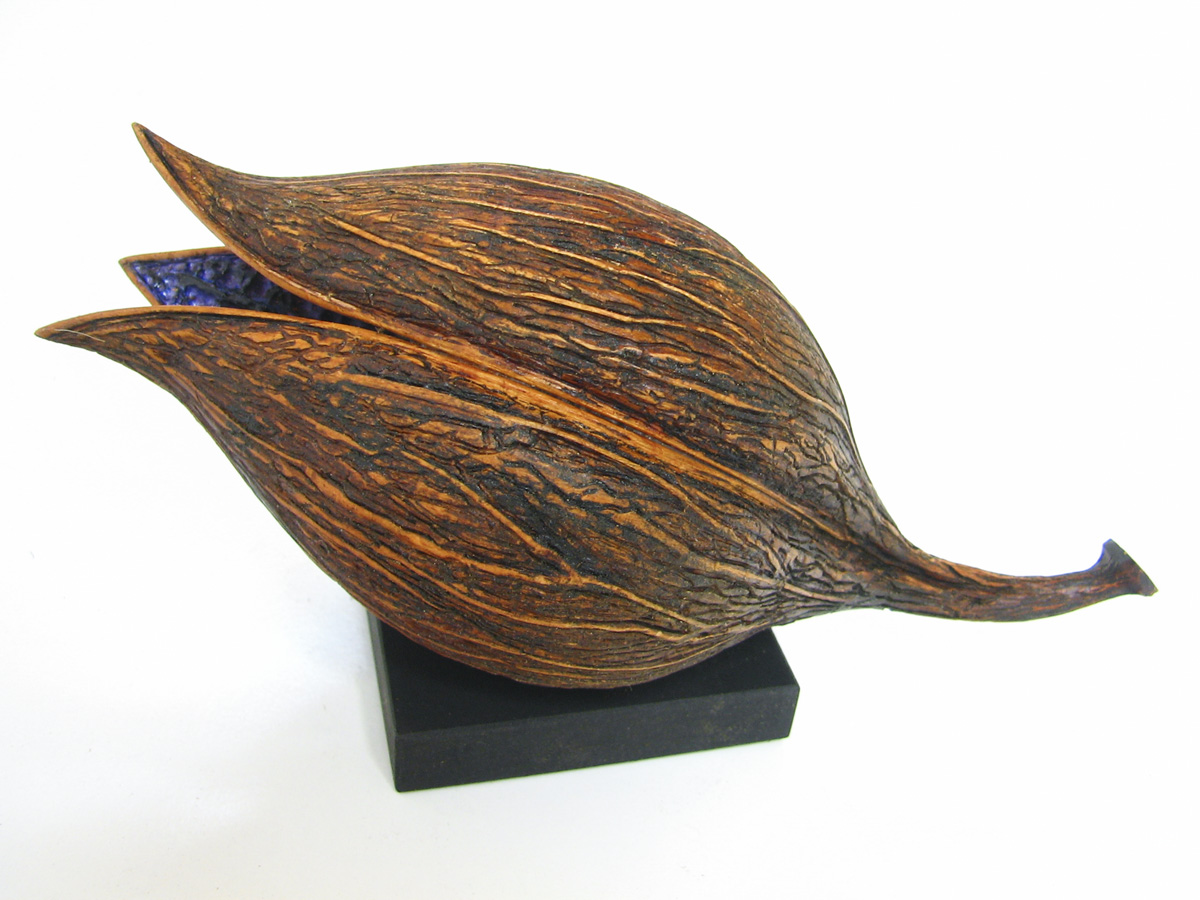
Now, apply several coats of your chosen colour for the inside of your
pod, I generally use acrylic. When dry, the pearls can be attached; a drop of cyanoacrylate
glue works very well to hold them in place.
|
|
|
The project is finally starting to look like a pod; it is now glue-up time. Use
normal wood glue sparingly as you don't want it oozing and dribbling inside the painted pod.
Use a small brush to clean up any glue that may show on the inside (watch out for those pearls!).
Mix up some paint with a little acrylic modelling paste so as to get a slightly thicker paint, and
very carefully paint over the interior joints (as before, be mindful of the pearls). While things
are drying, carve the stalk. This is doweled to the pod using a short piece of bamboo kebab
skewer as dowel.
|
|
|
It is now time for the final touches to be made. First of all staining; I generally
use spirit stains. Select your stain colour taking into consideration the initial wood colour and
the final colour you want to arrive at (teak brown suited my situation). Because we have
a mixture of side as well as end-grain any staining is going to be uneven, for that reason
I like to give a sealer coat first. This does make the stain dry slower but also more evenly.
After the seal coat, stain all unpainted parts of your pod, leave it to dry then very lightly
sand with about 320-400 grit. This will really highlight your texturing as only the high points
are sanded back. To further emphasise the texturing, scrape or sand the top of the veins
completely clean.
|
|
|
You are now almost finished; I generally use a thin coat of spray-on furniture
lacquer for the finish coat; a wipe on finish tends to fill up the texture crevasses. You will
notice that if adequate care is taken, the stalk's joint is barely noticeable.
A very simple base is easy to make, this one is made of 10mm (3/8in) MDF and was sprayed a matt black.
|
|
|
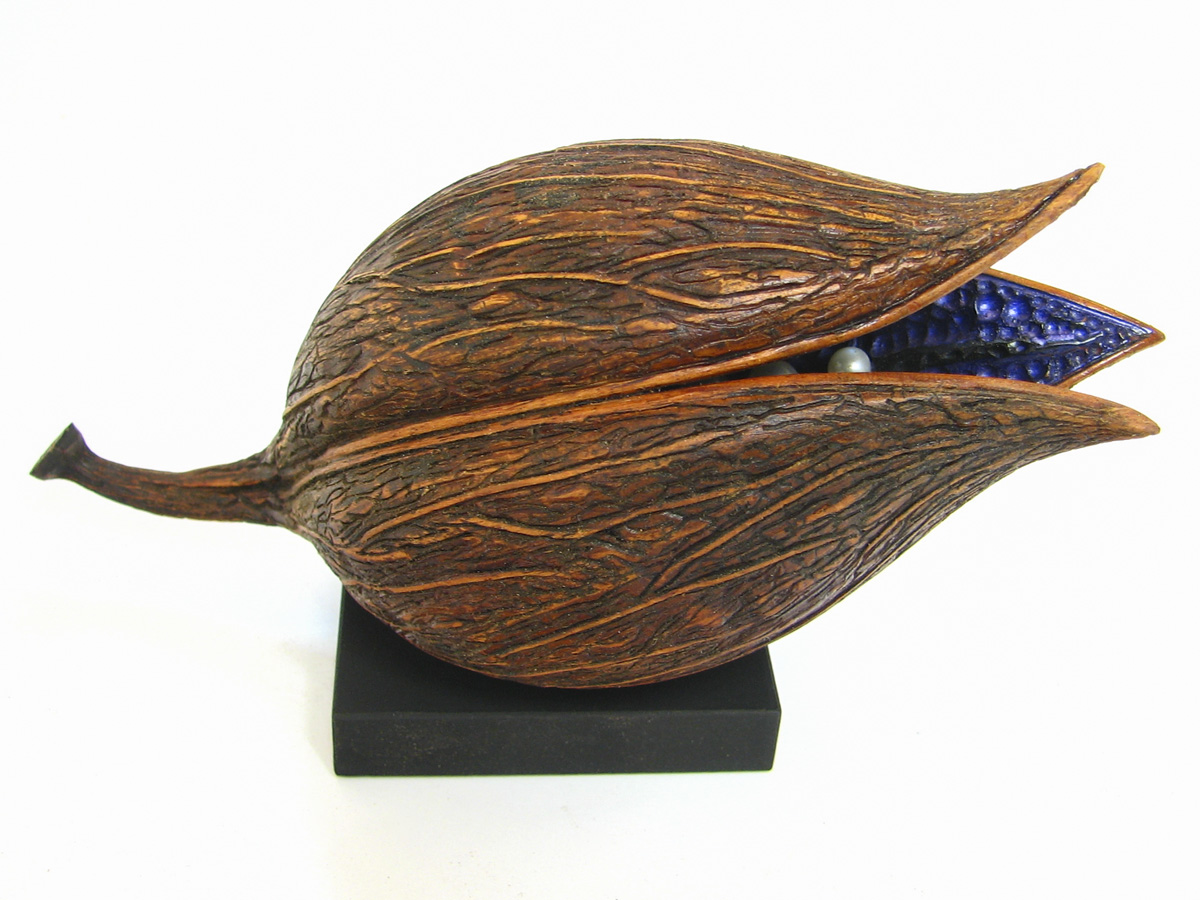
Well, there we have it! Most of us will know that it's possible to handle any
seemingly 'impossible' and daunting task, providing that it is broken up into manageable,
digestible bites.
I hope this stimulates you to create bigger and better things.
|
|
|
|
|
Handy Hints:
- While I do have a variety of rifflers to tidy up carved beads and ridges, my favourite tool is a 5mm (3/16 in) square
file, purchased at my local hardware store. To make it suit my purpose, I ground one of the four sides com pletely smooth.
By running the smooth side down you are able to tidy up the side of a bead without damaging the surrounding area.
Conversely, by turning it cutting edge down you can flatten the surrounding area. This is also good for cleaning the
internal corner without marking the bead.
- A bland piece of wood can, with the right design, be made into a pretty piece of turning; conversely a pretty piece
of wood can become nothing with bad design
- Better a small, well thought out piece of turning, than a large badly designed piece which is only good as a doorstop
|
Tools used:
- pair of compasses
- compound drop saw (or bandsaw)
- pair of callipers
- duct tape
- hollowing tool
- chisel
- pyramid
- shape burr
- cylinder burr
- diamond disc
- acrylic paint
- spirit stain
- spray-on furniture lacquer
|